Docsnap - Getting Started Guide
A step-by-step walkthrough for new users. For the latest version, visit docsnap.com/onboarding.
Your First Few Minutes in Docsnap
A quick, step-by-step walkthrough to get you onboarded onto the Docsnap App.


Before You Begin
You'll get set up fastest if you have these ready:
- Get Docsnap from the App Store or Google Play. You can install it on your phone or tablet.
- An active Docsnap subscription (start on the Pricing page if you don't have one yet).
- The login code emailed to you right after signing up.
- Your government-issued ID and complete address history, including current and past home addresses.
How to Set Up the Docsnap App
Follow along in order. It only takes a few minutes.
Start your sign up
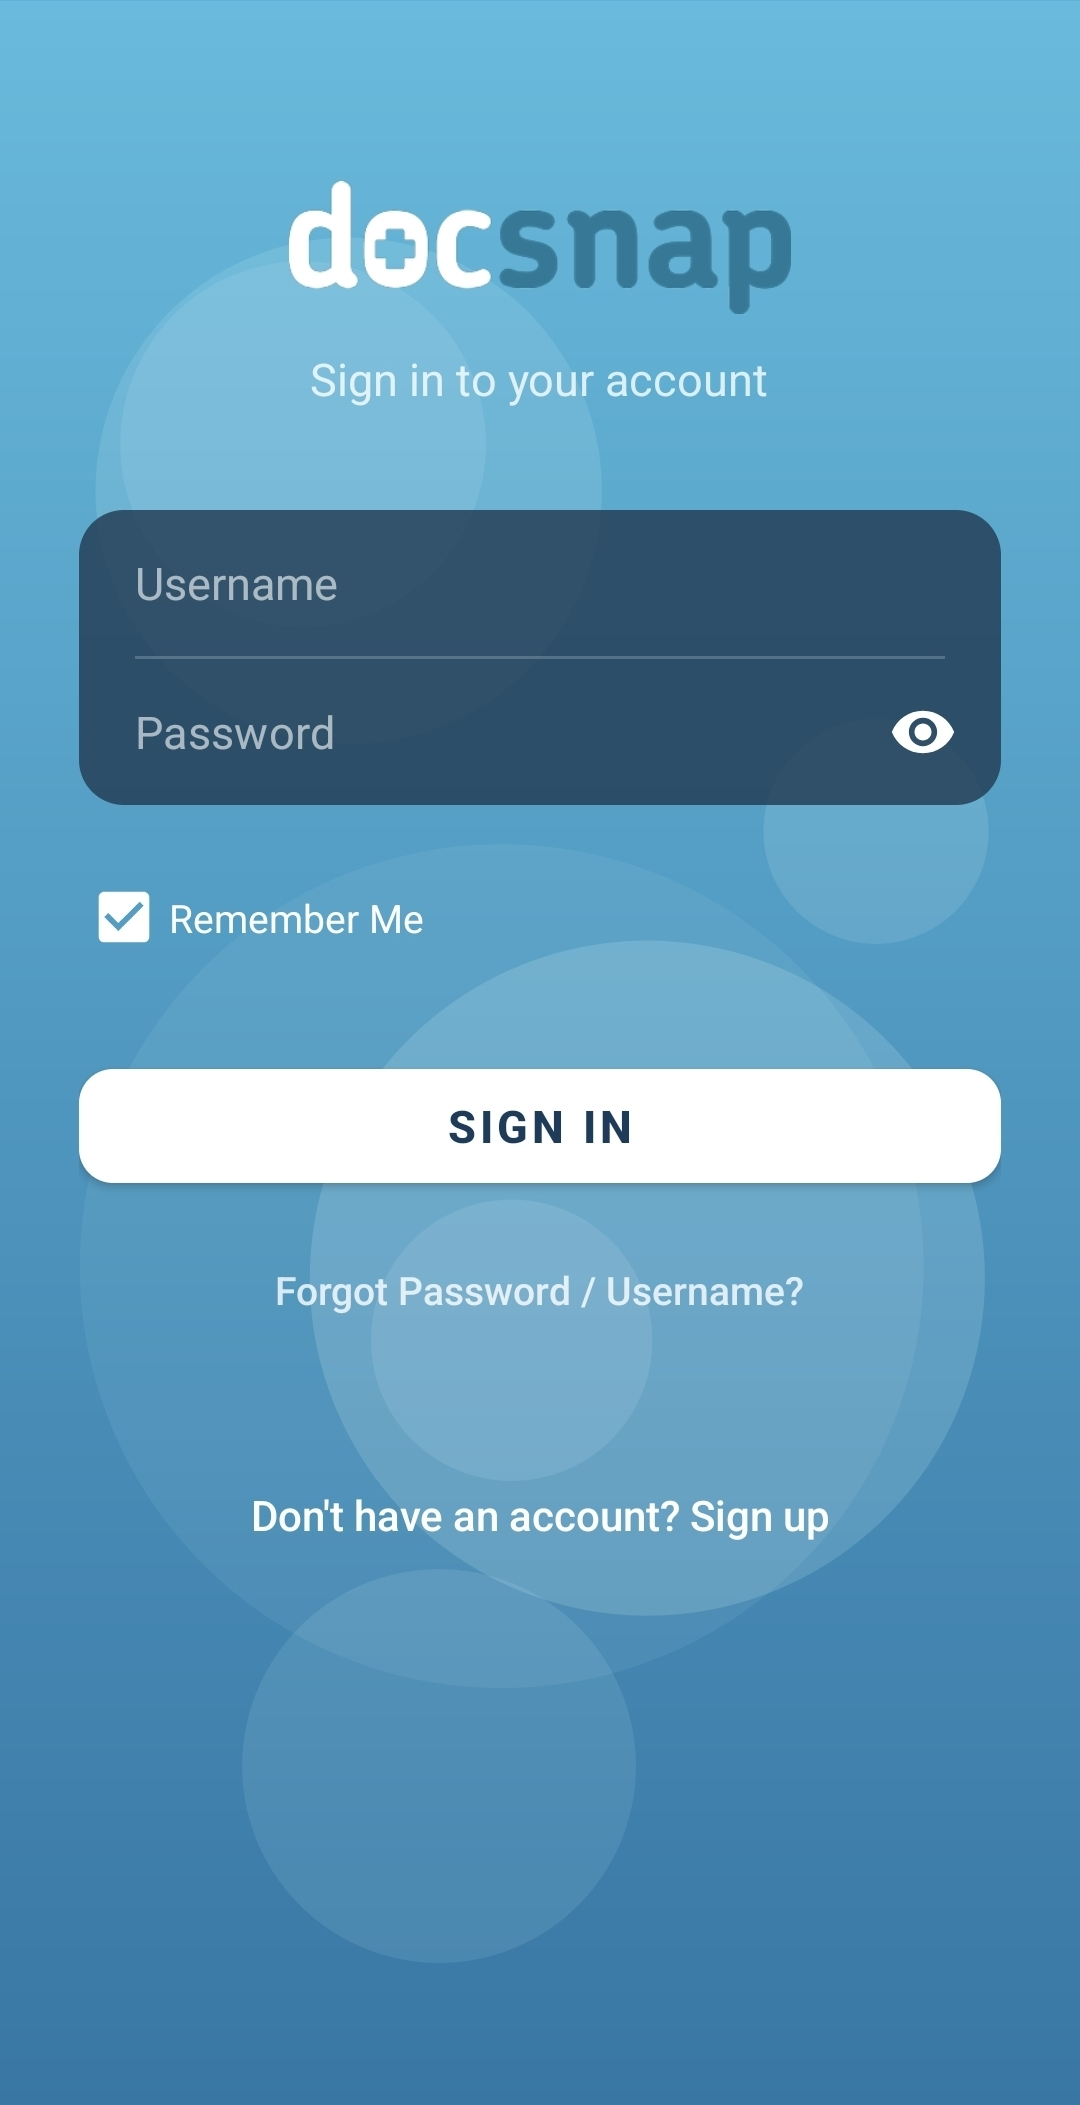
After downloading and opening the Docsnap app, tap Don't have an account? Sign up on the login screen.
Enter your login code
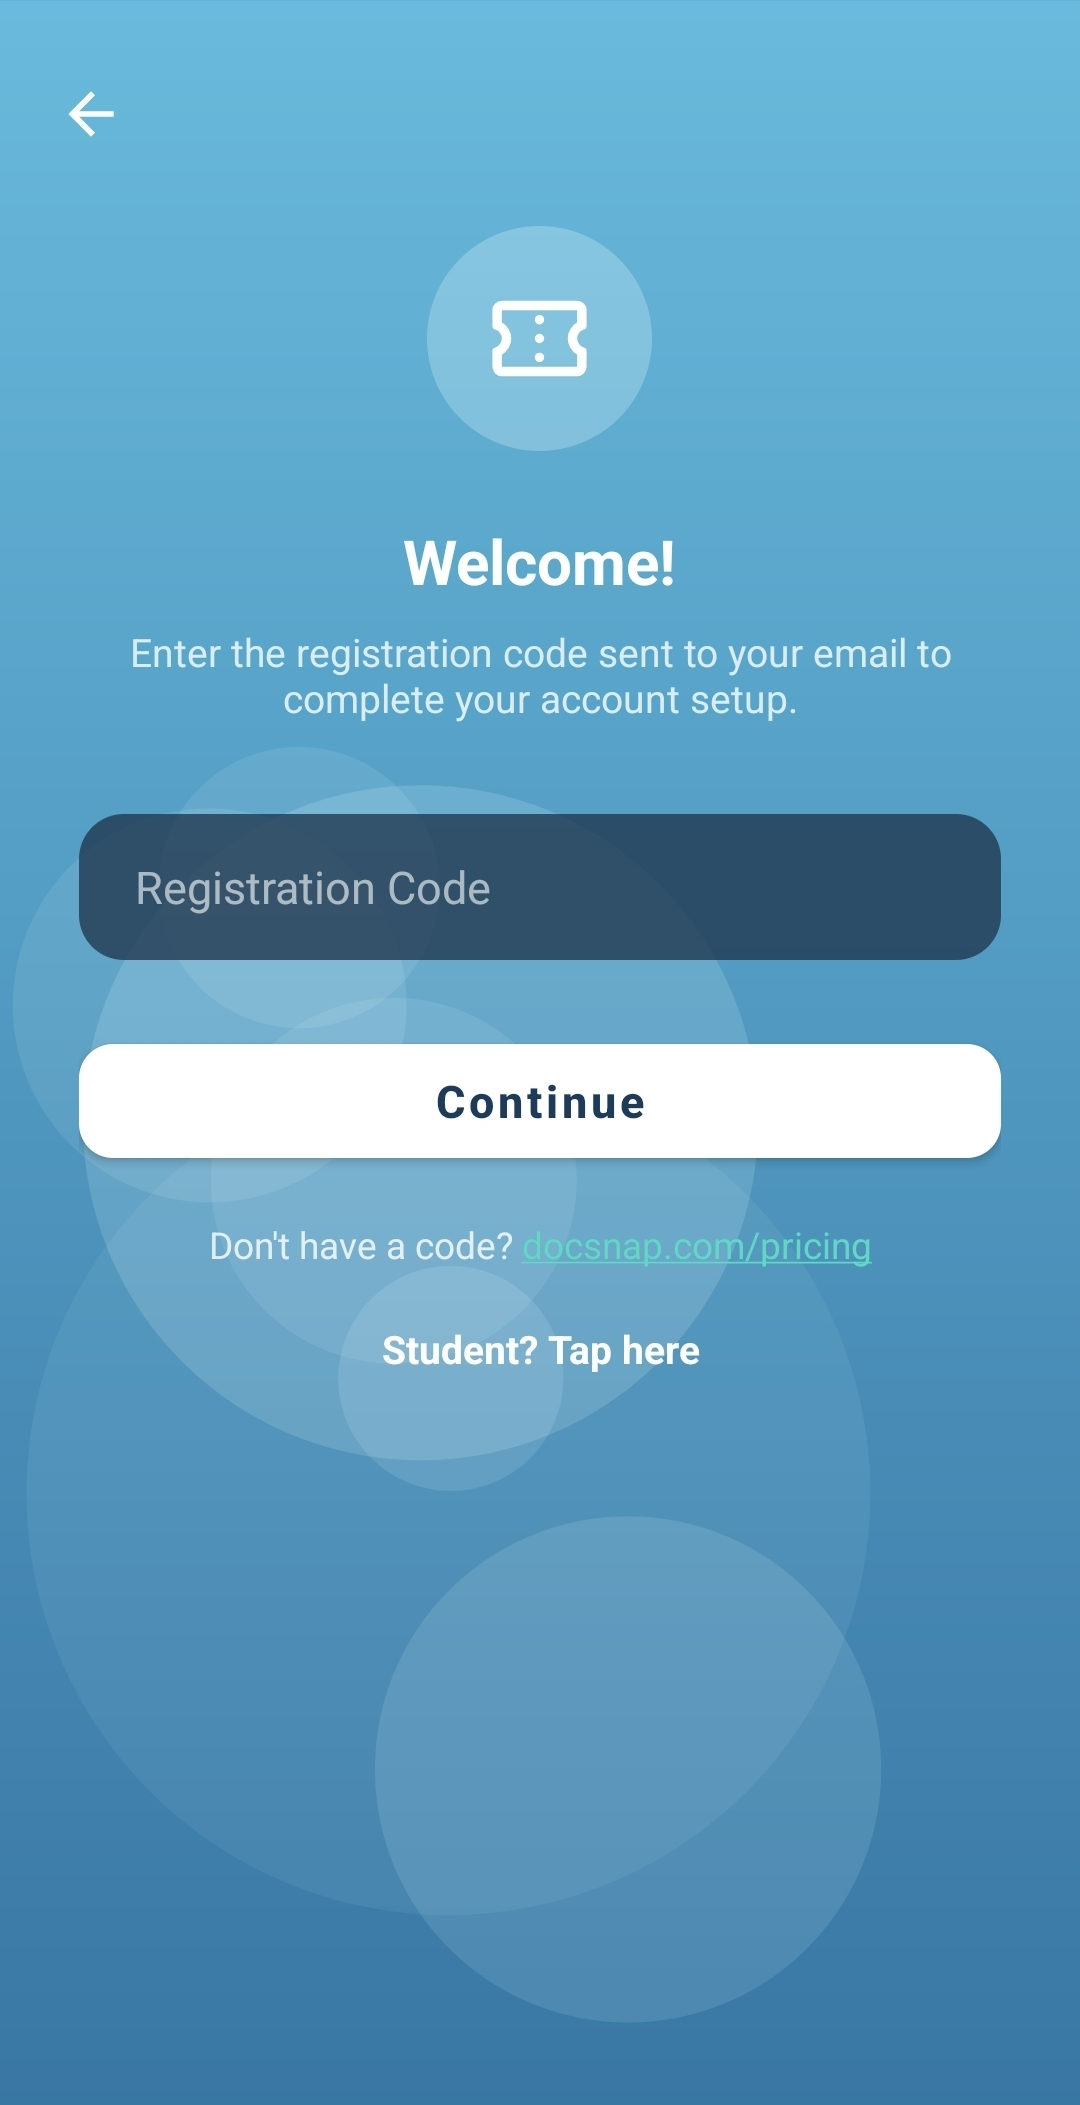
Check your inbox for a Welcome to Docsnap! Your Journey Starts Here email. Enter the login code provided in the email.
If you have not created a subscription, tap the docsnap.com/pricing link and choose your pricing plan. Your login code will then be emailed to you.
Verify your Identity
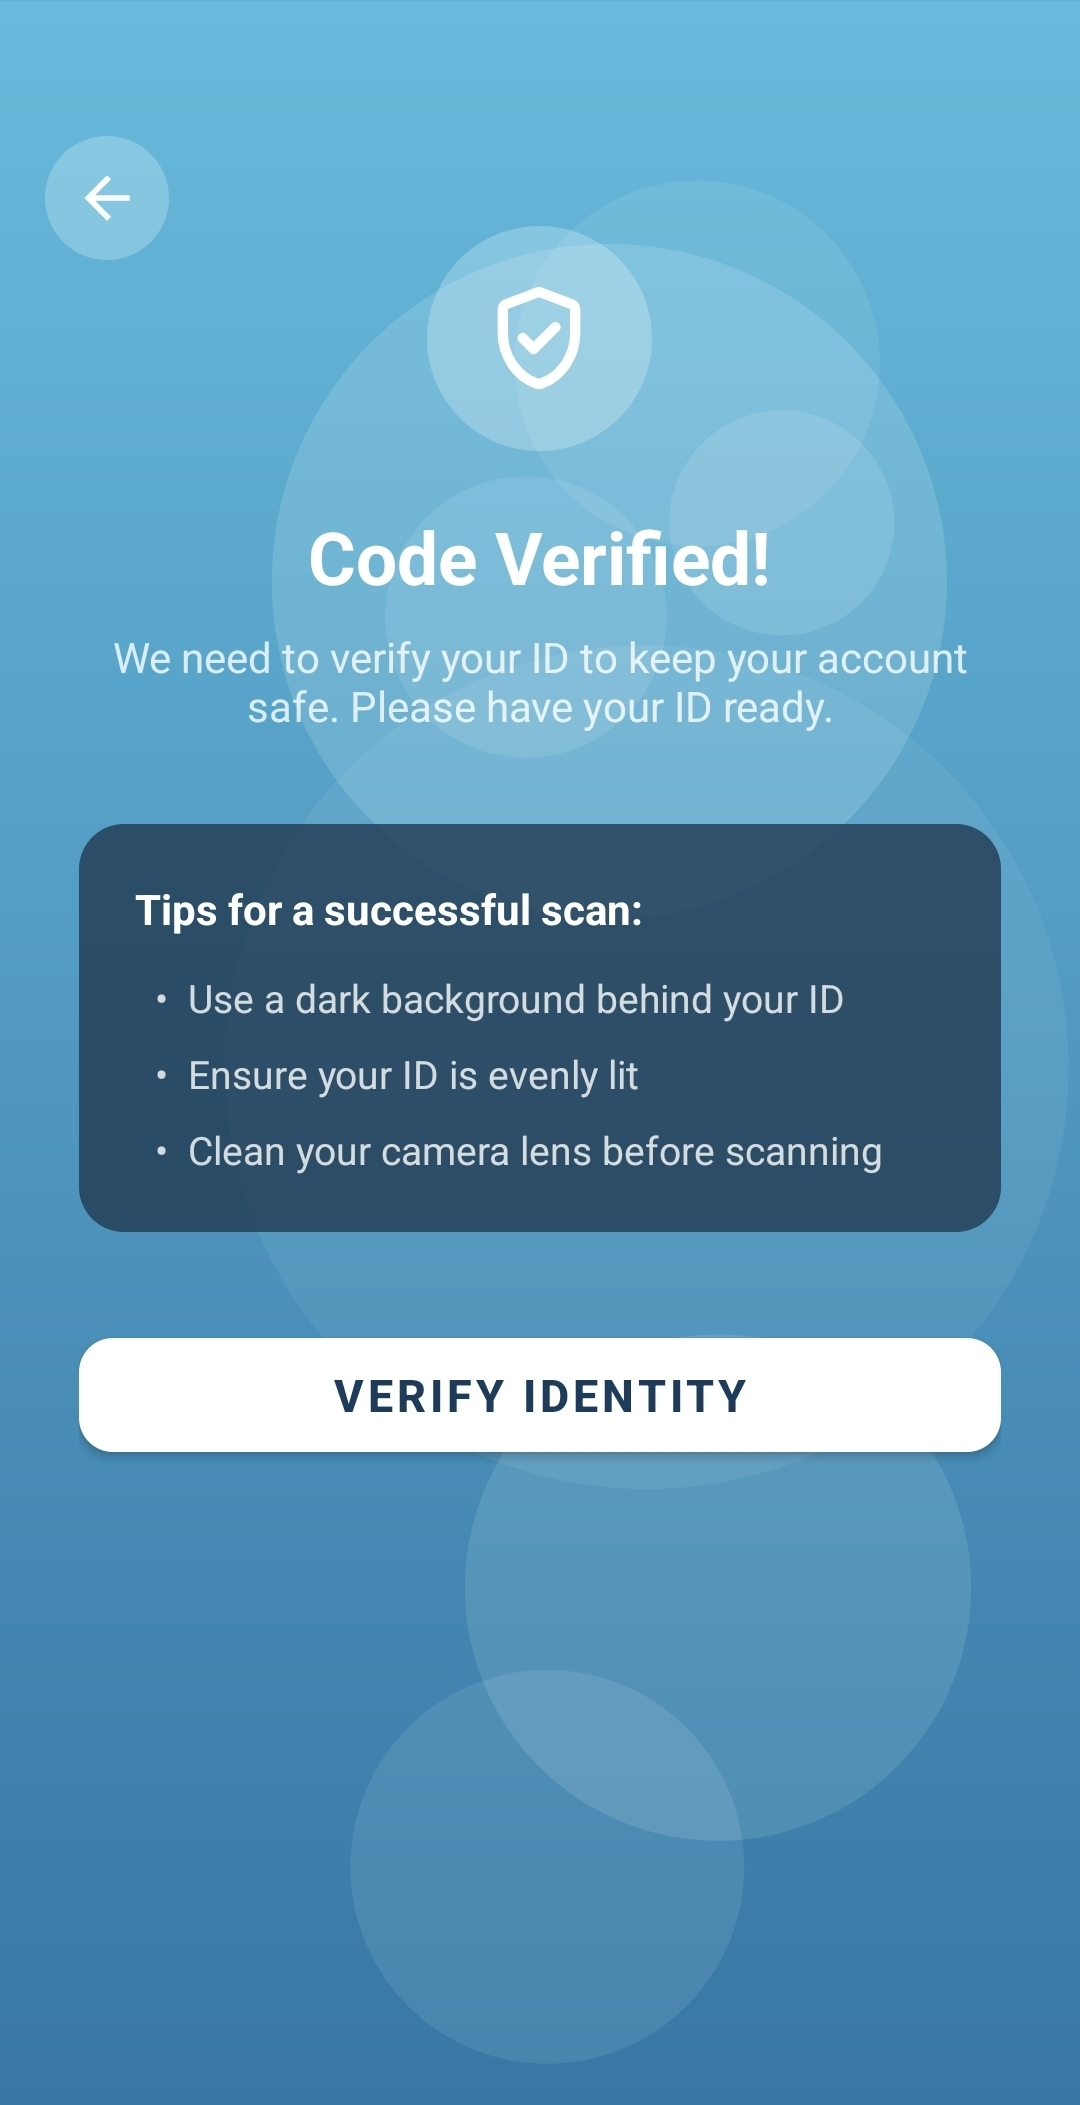
Have your ID ready to scan. Tap Verify Identity.
Place it on a dark, flat surface with even lighting, and make sure your camera lens is clean before you begin.
Scan your government-issued ID
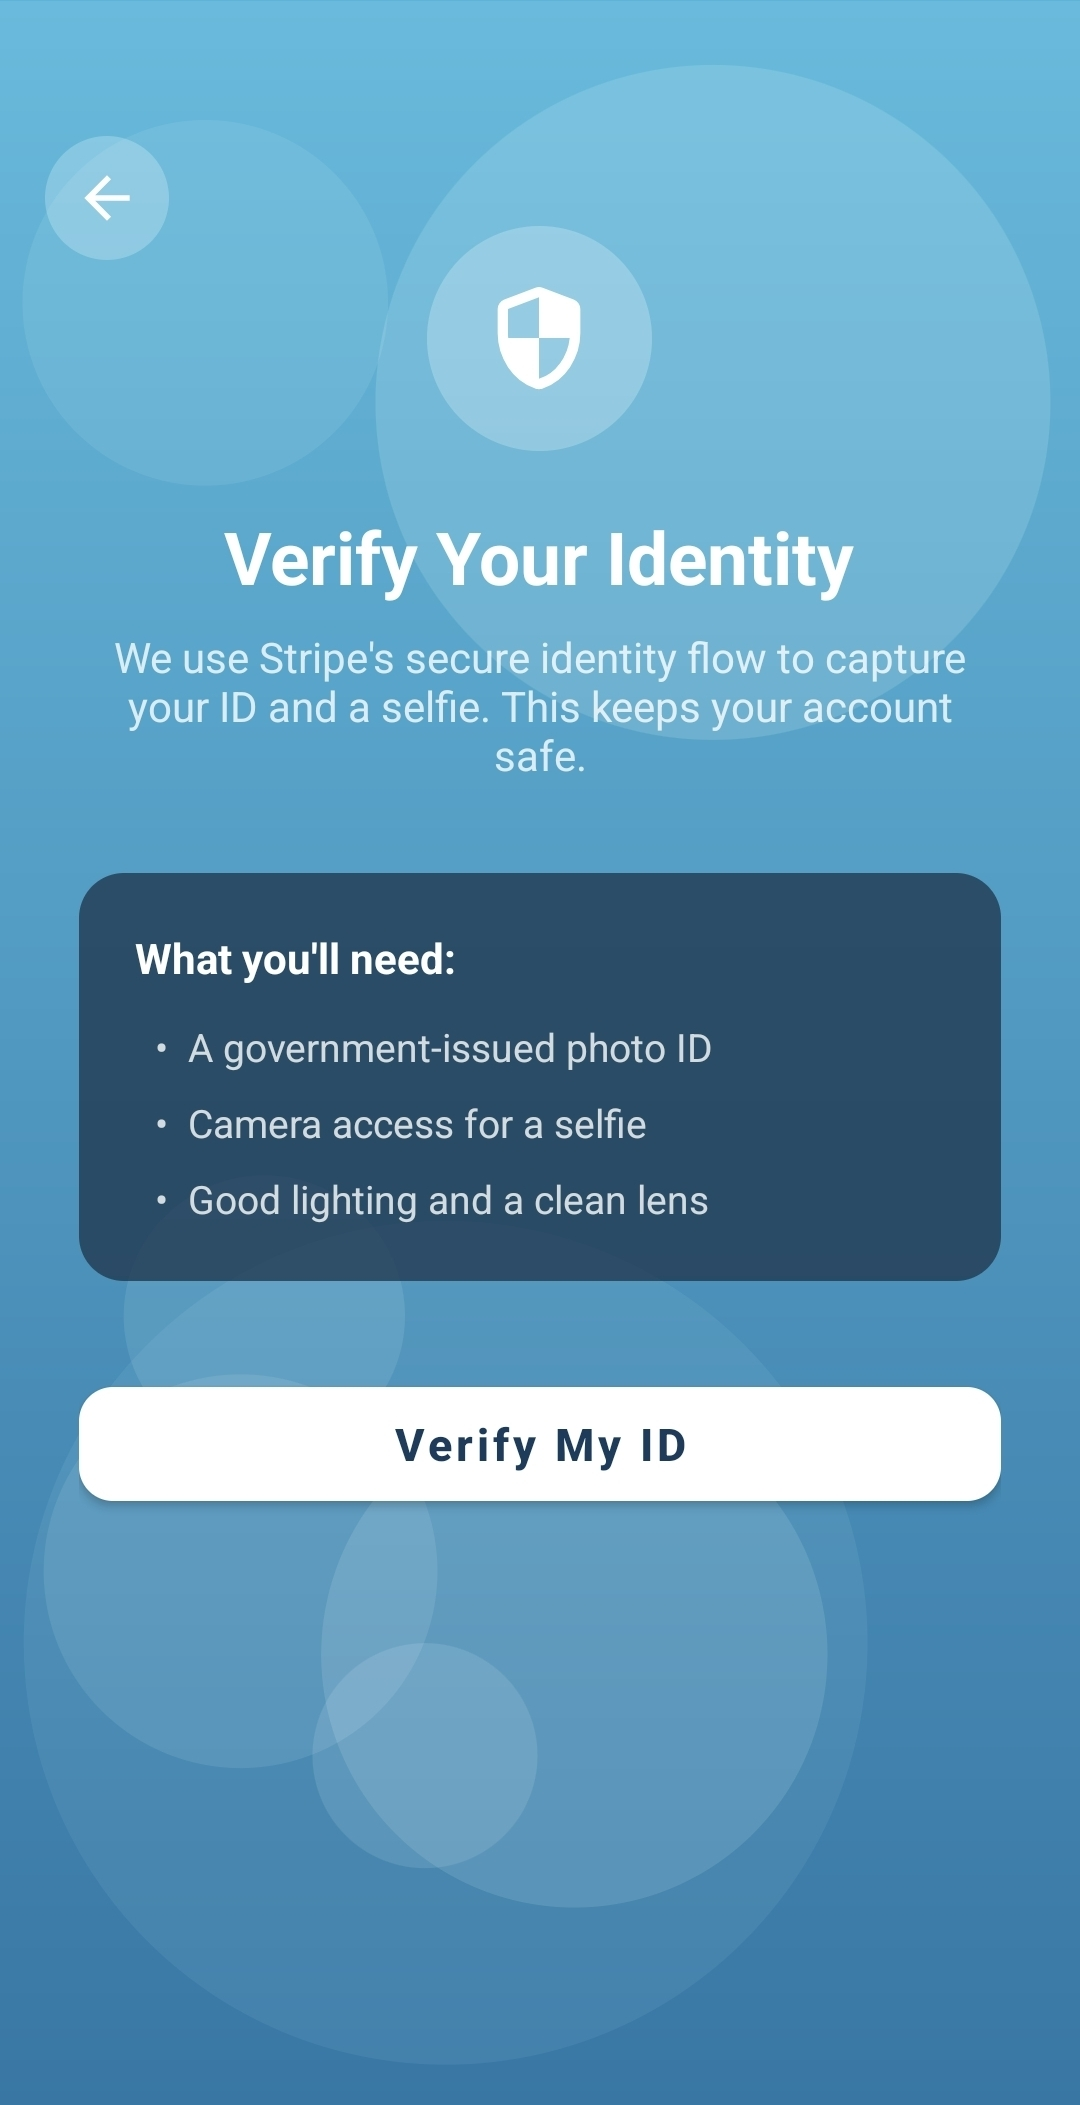
Tap Verify My ID. Follow the prompts to scan the front and back of your ID. Ensure that all scanned information is accurate.
Docsnap uses Stripe's secure identity flow to capture your ID and a selfie. We use this to verify your identity and keep your account secure.
Add your address history
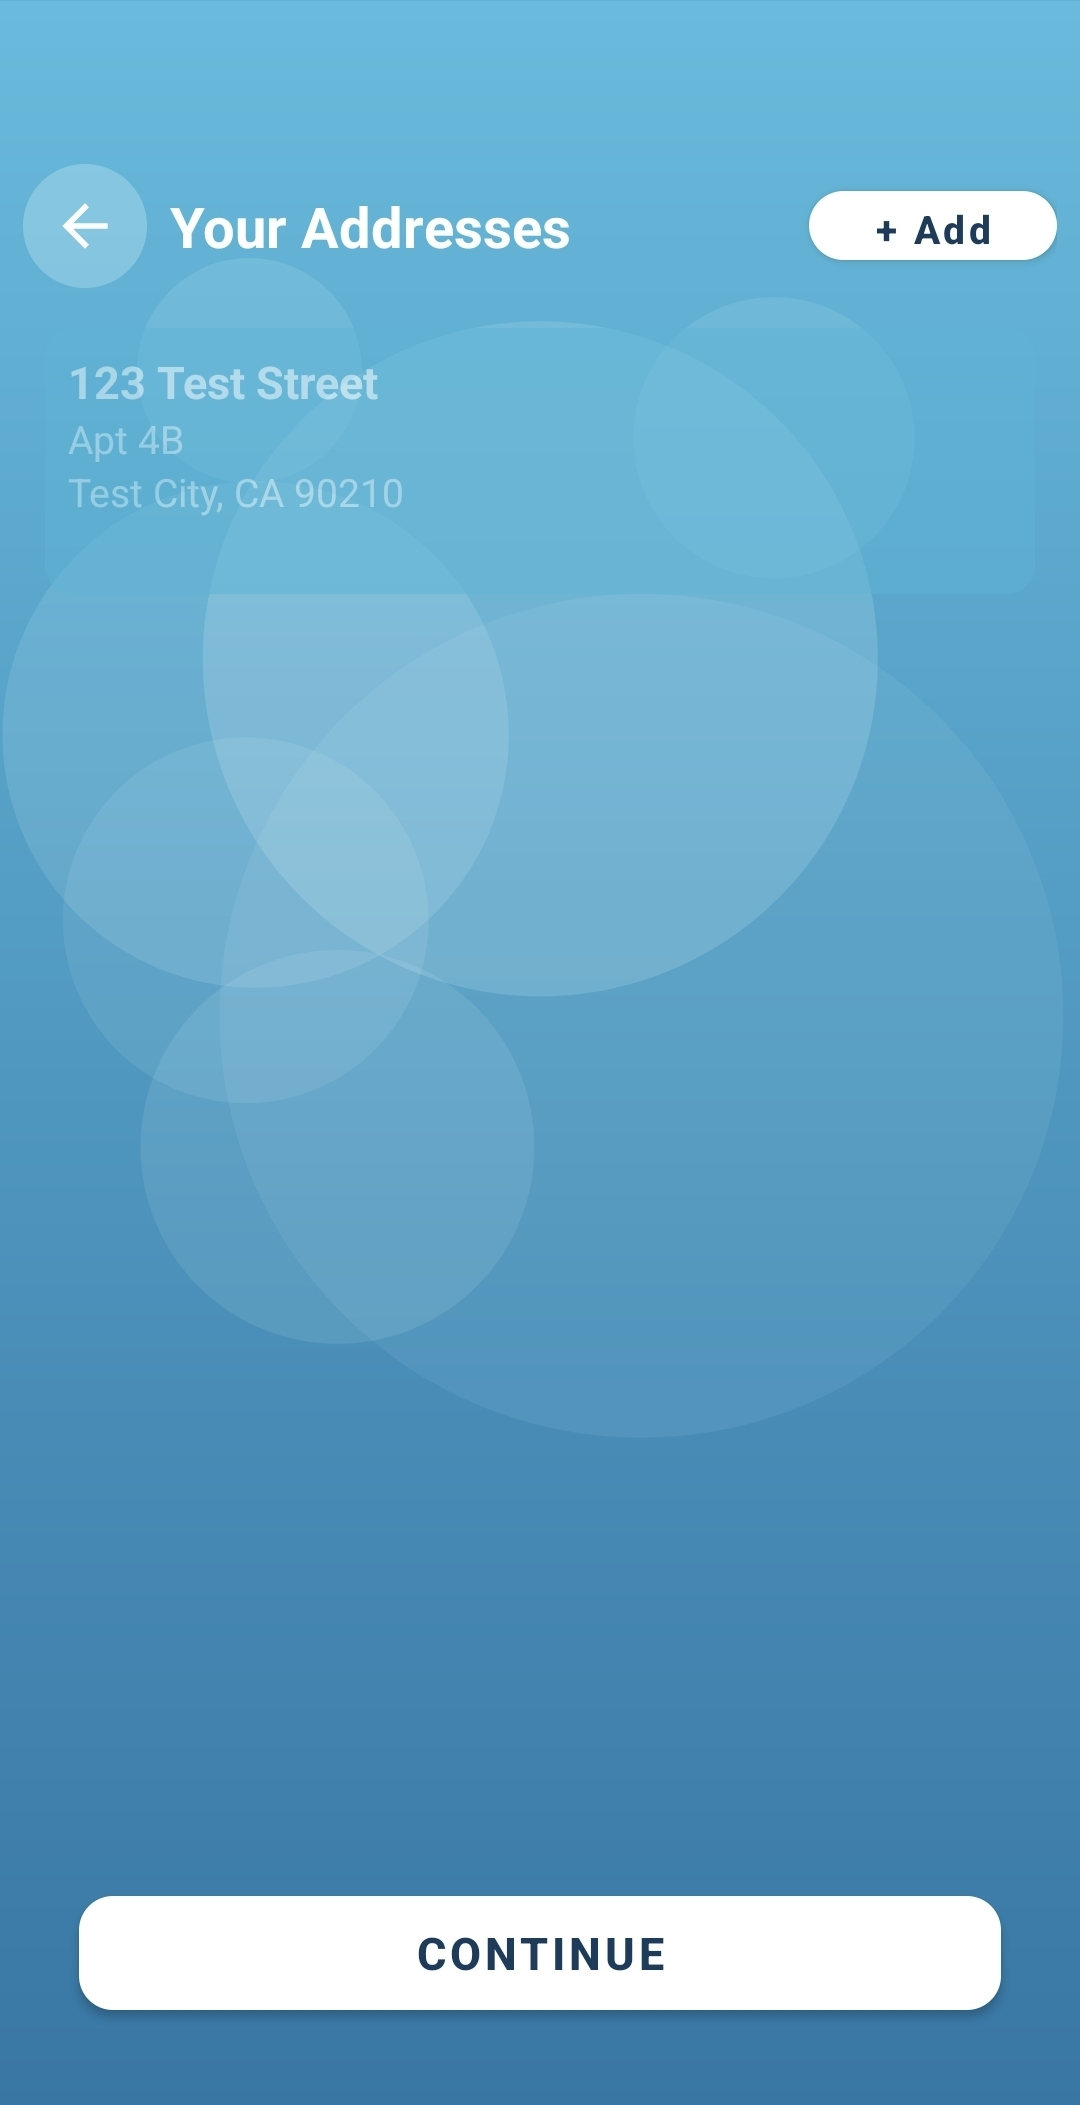
Tap + Add to add your complete address history, including all previous addresses and your current address, along with the phone number you had while living at each address.
You can always update your address history later from your profile.
Save each address
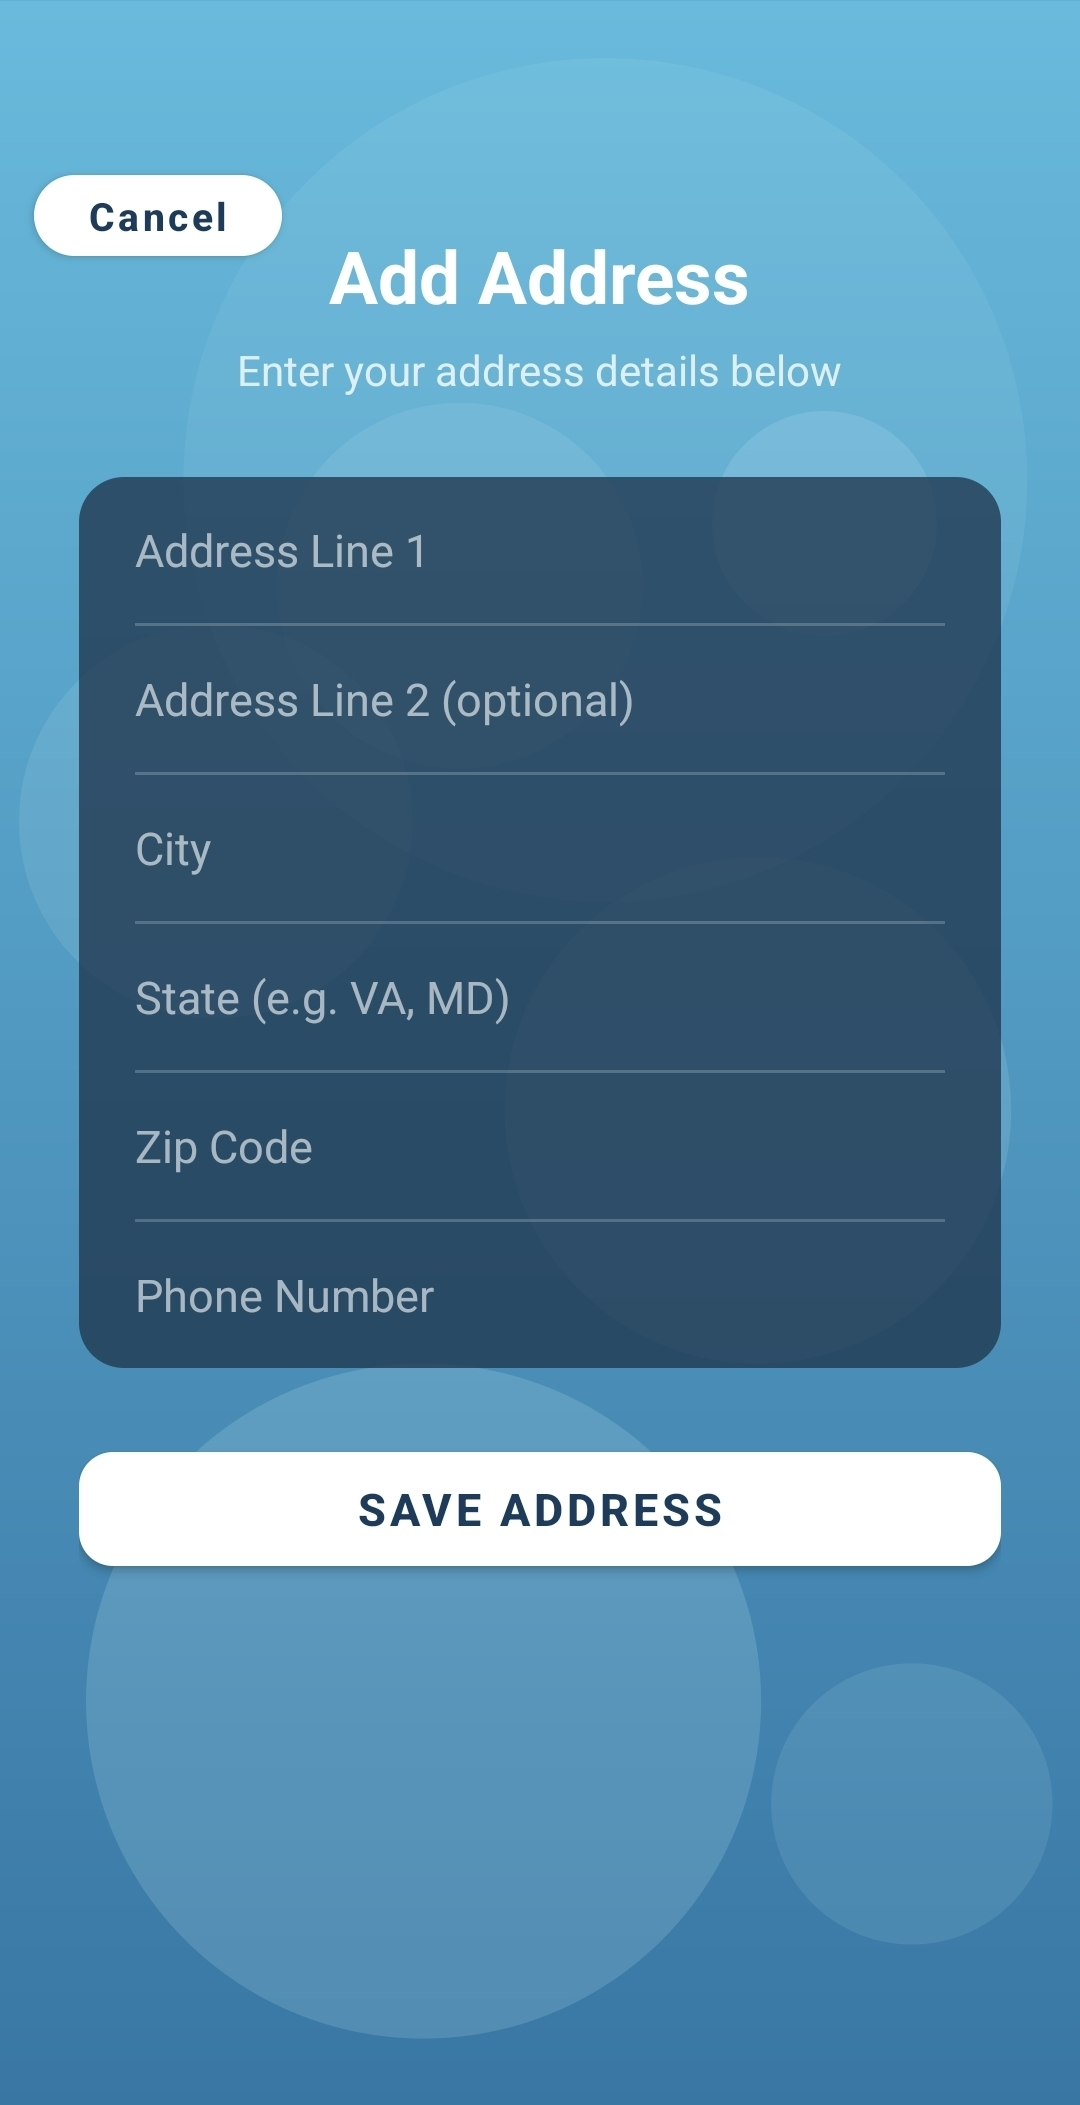
Fill in the address information and tap Save Address.
Continue once every address is added
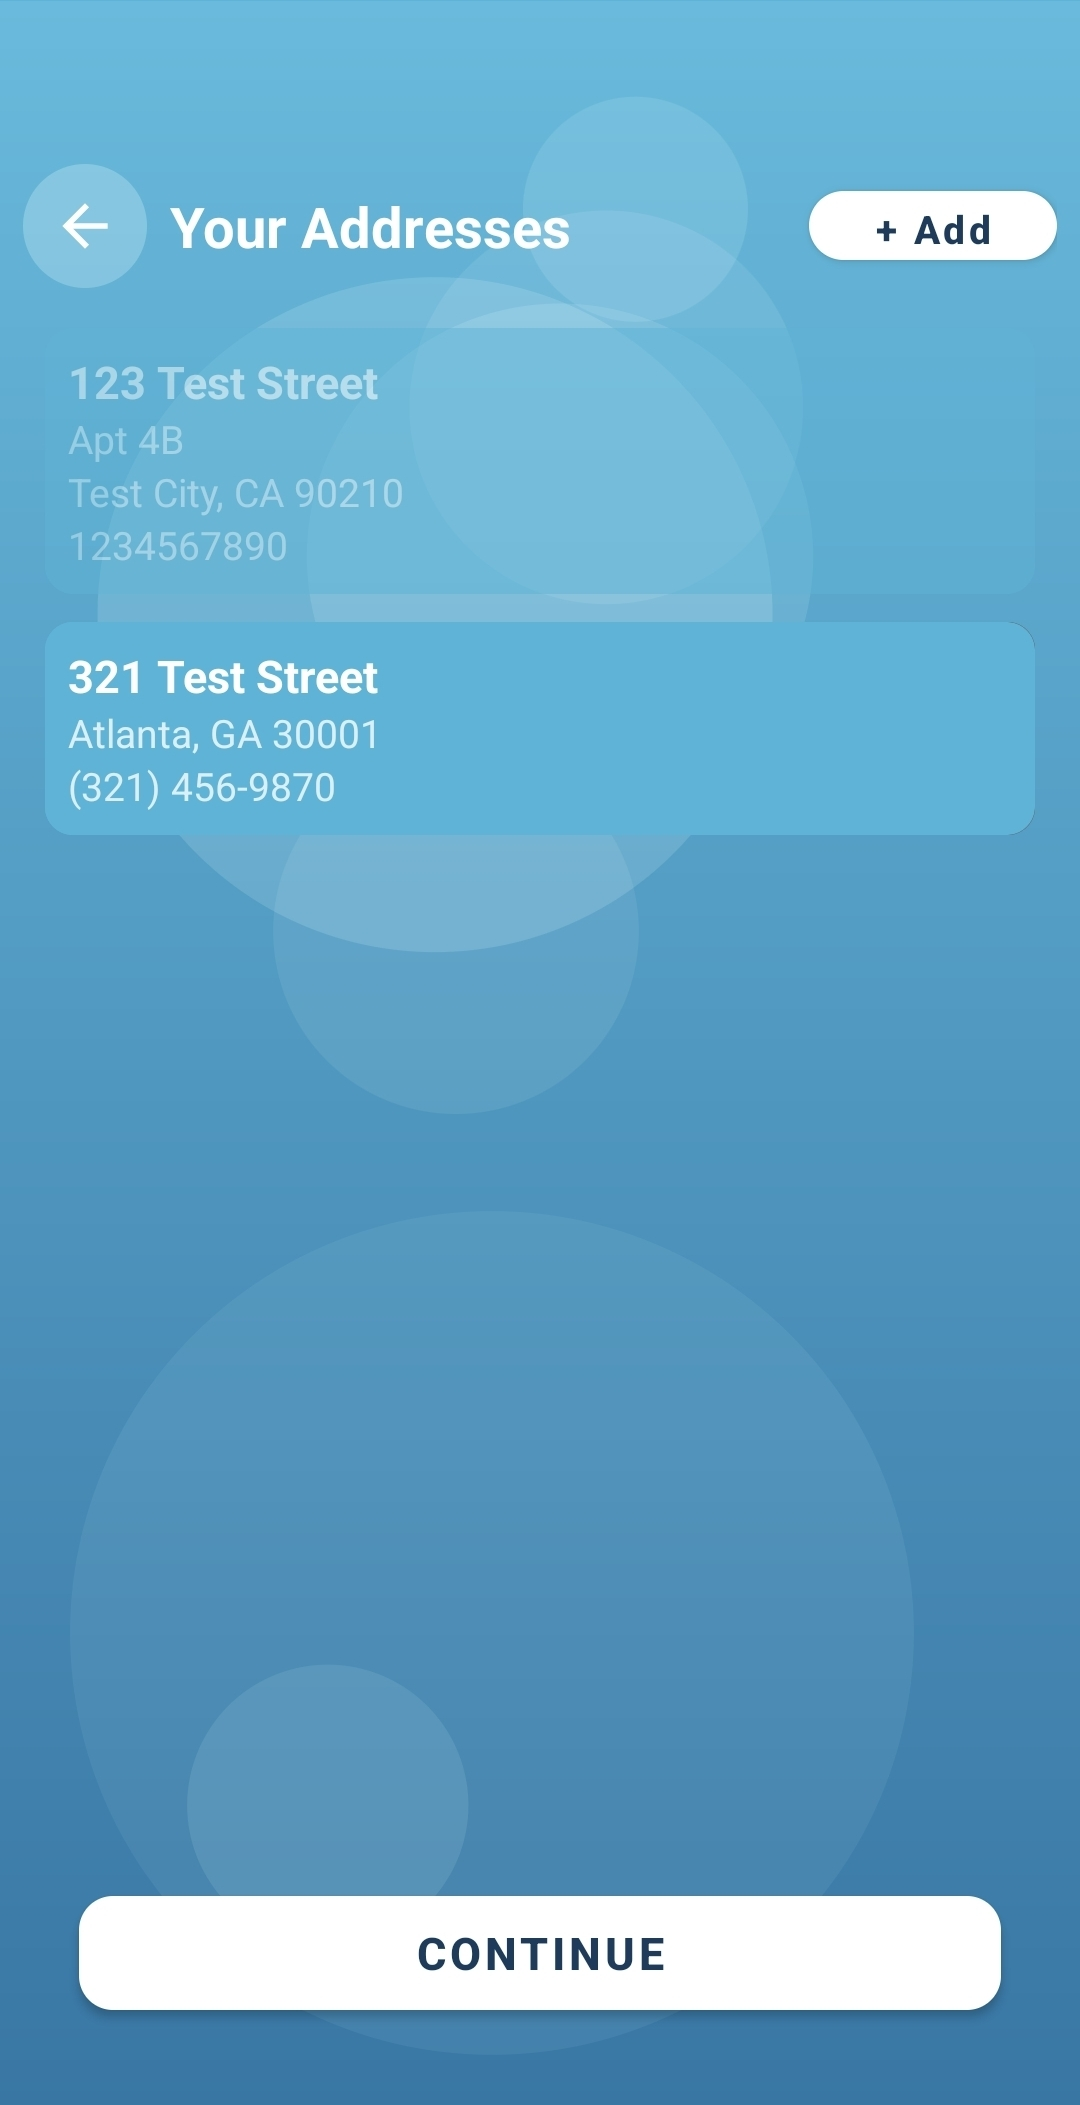
After adding all of your previous address history, tap Continue.
Incomplete address history could result in missing medical records. Repeat the + Add process for every prior address before continuing, and enter the phone number you had while living at that address.
Add a profile photo
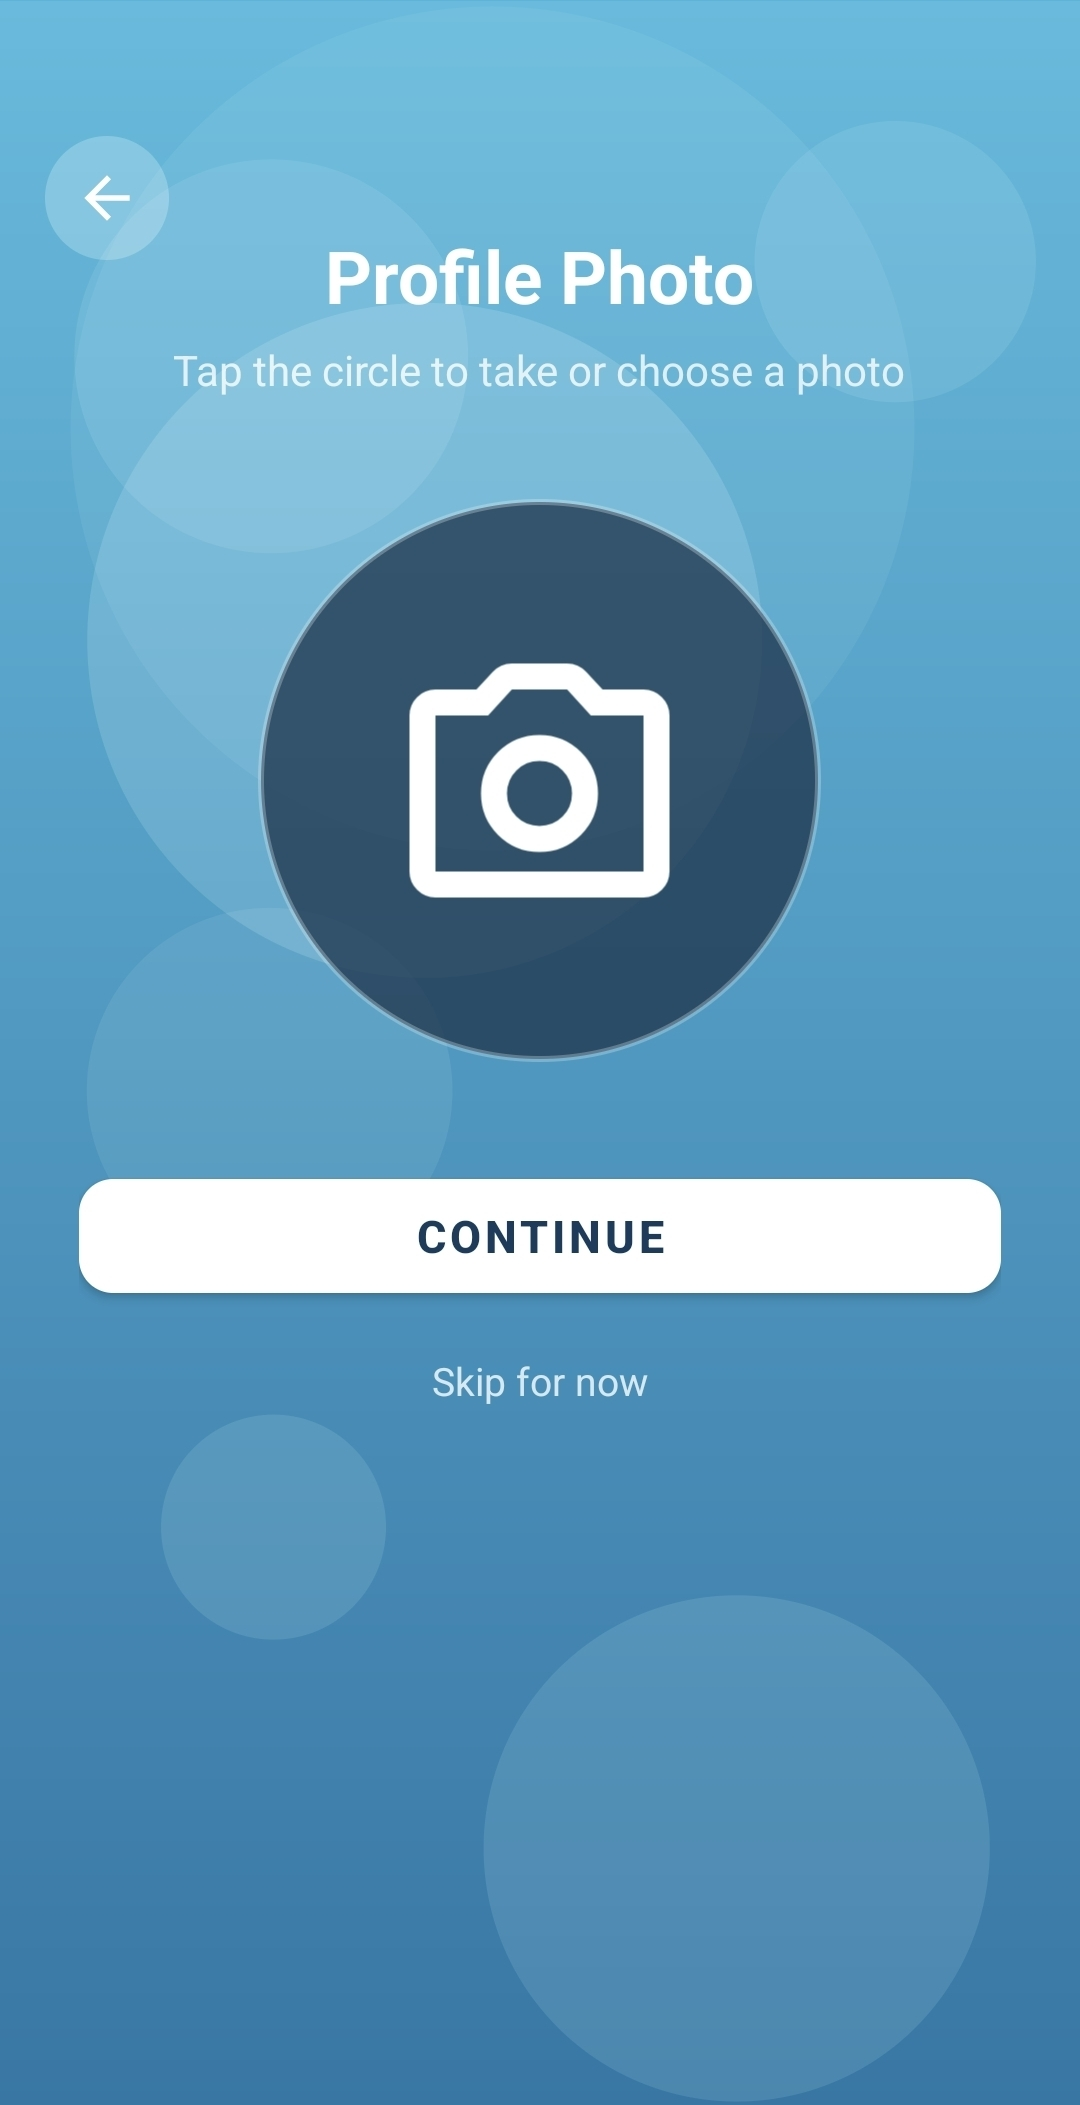
Tap the camera icon to take a photo for your profile, then tap Continue.
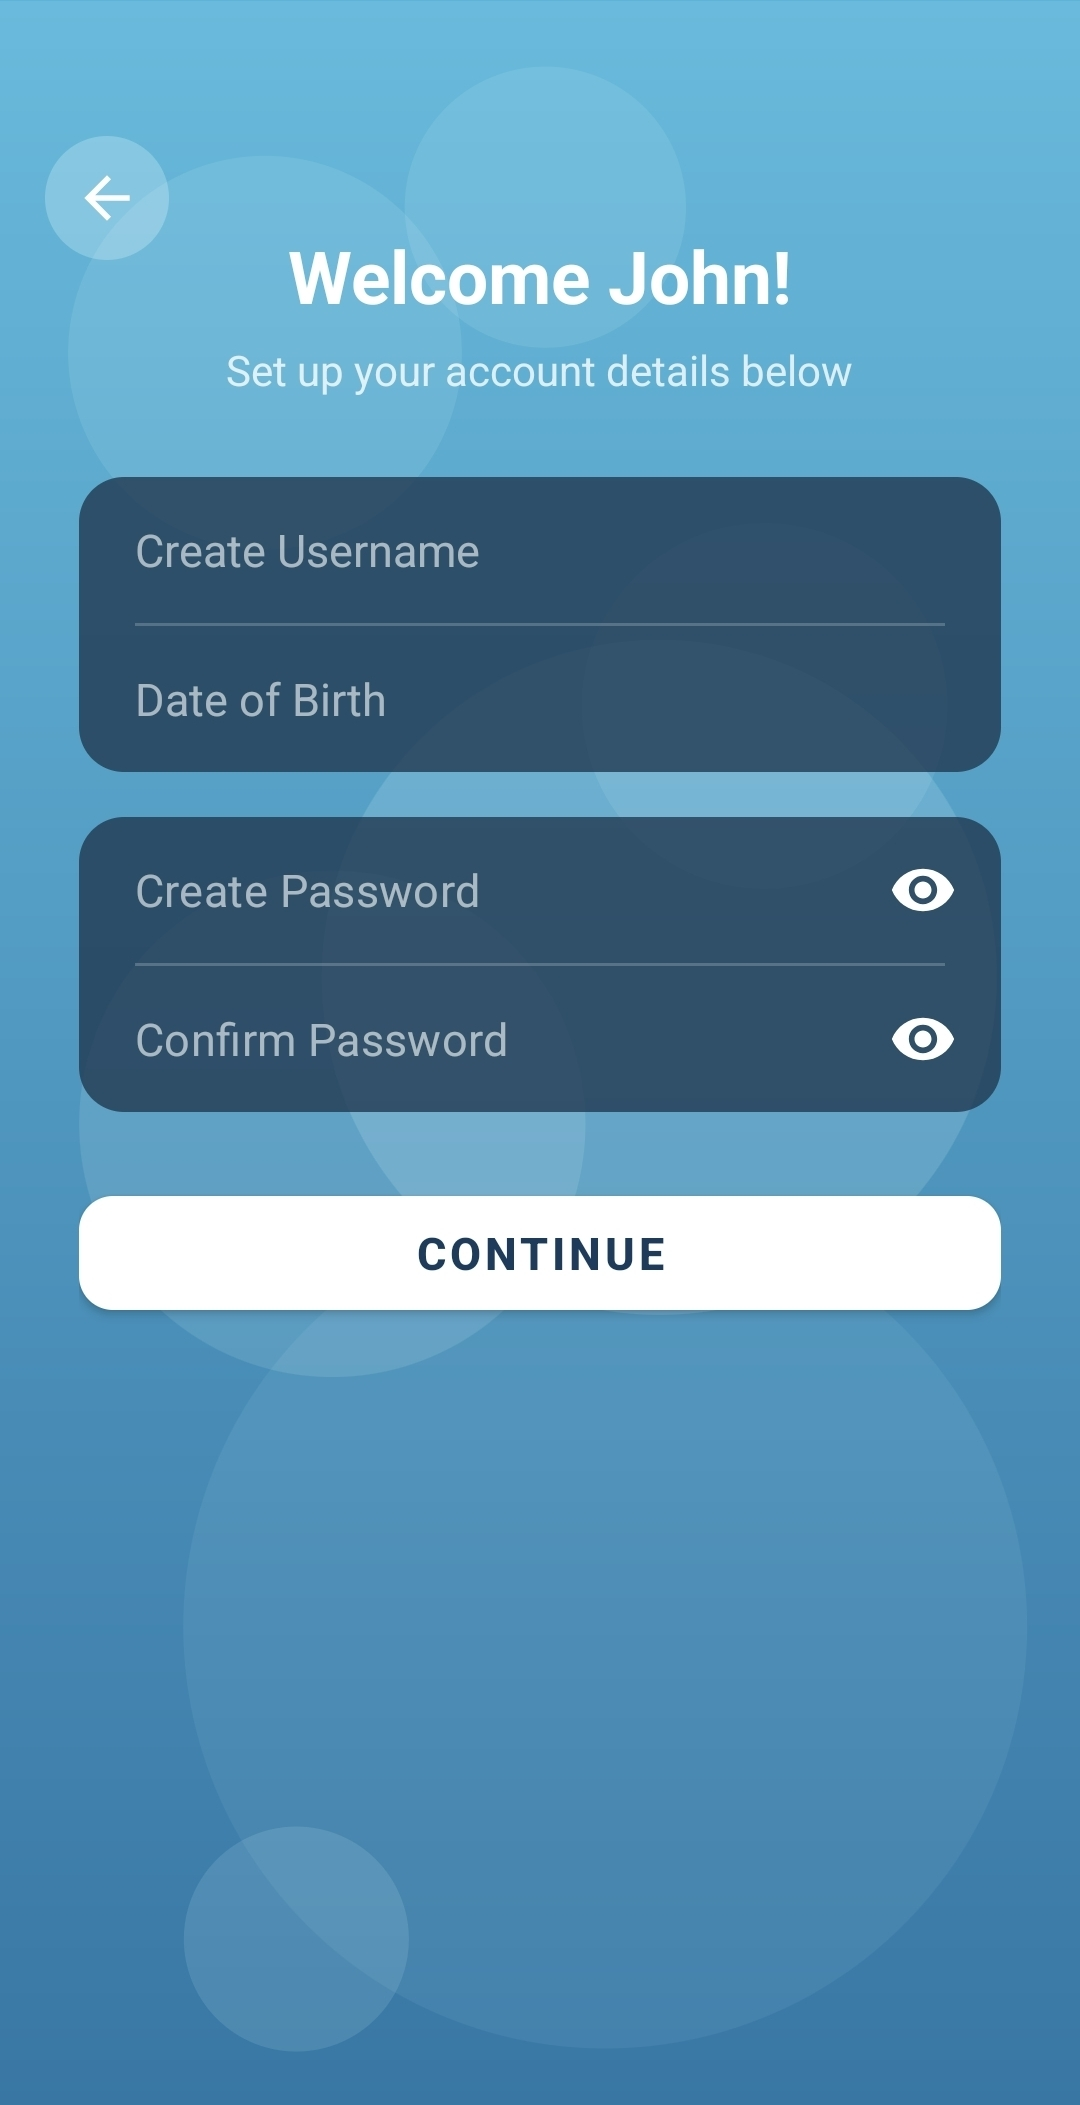
Create your username and password
Create your username and enter your date of birth. Create and confirm your password with the requirements listed below. Be sure to record your username and password, you will use it to log in to the app from now on. Tap Continue.
Password requirements: At least 8 characters, including 1 uppercase letter, 1 lowercase letter, 1 number, and 1 special character.
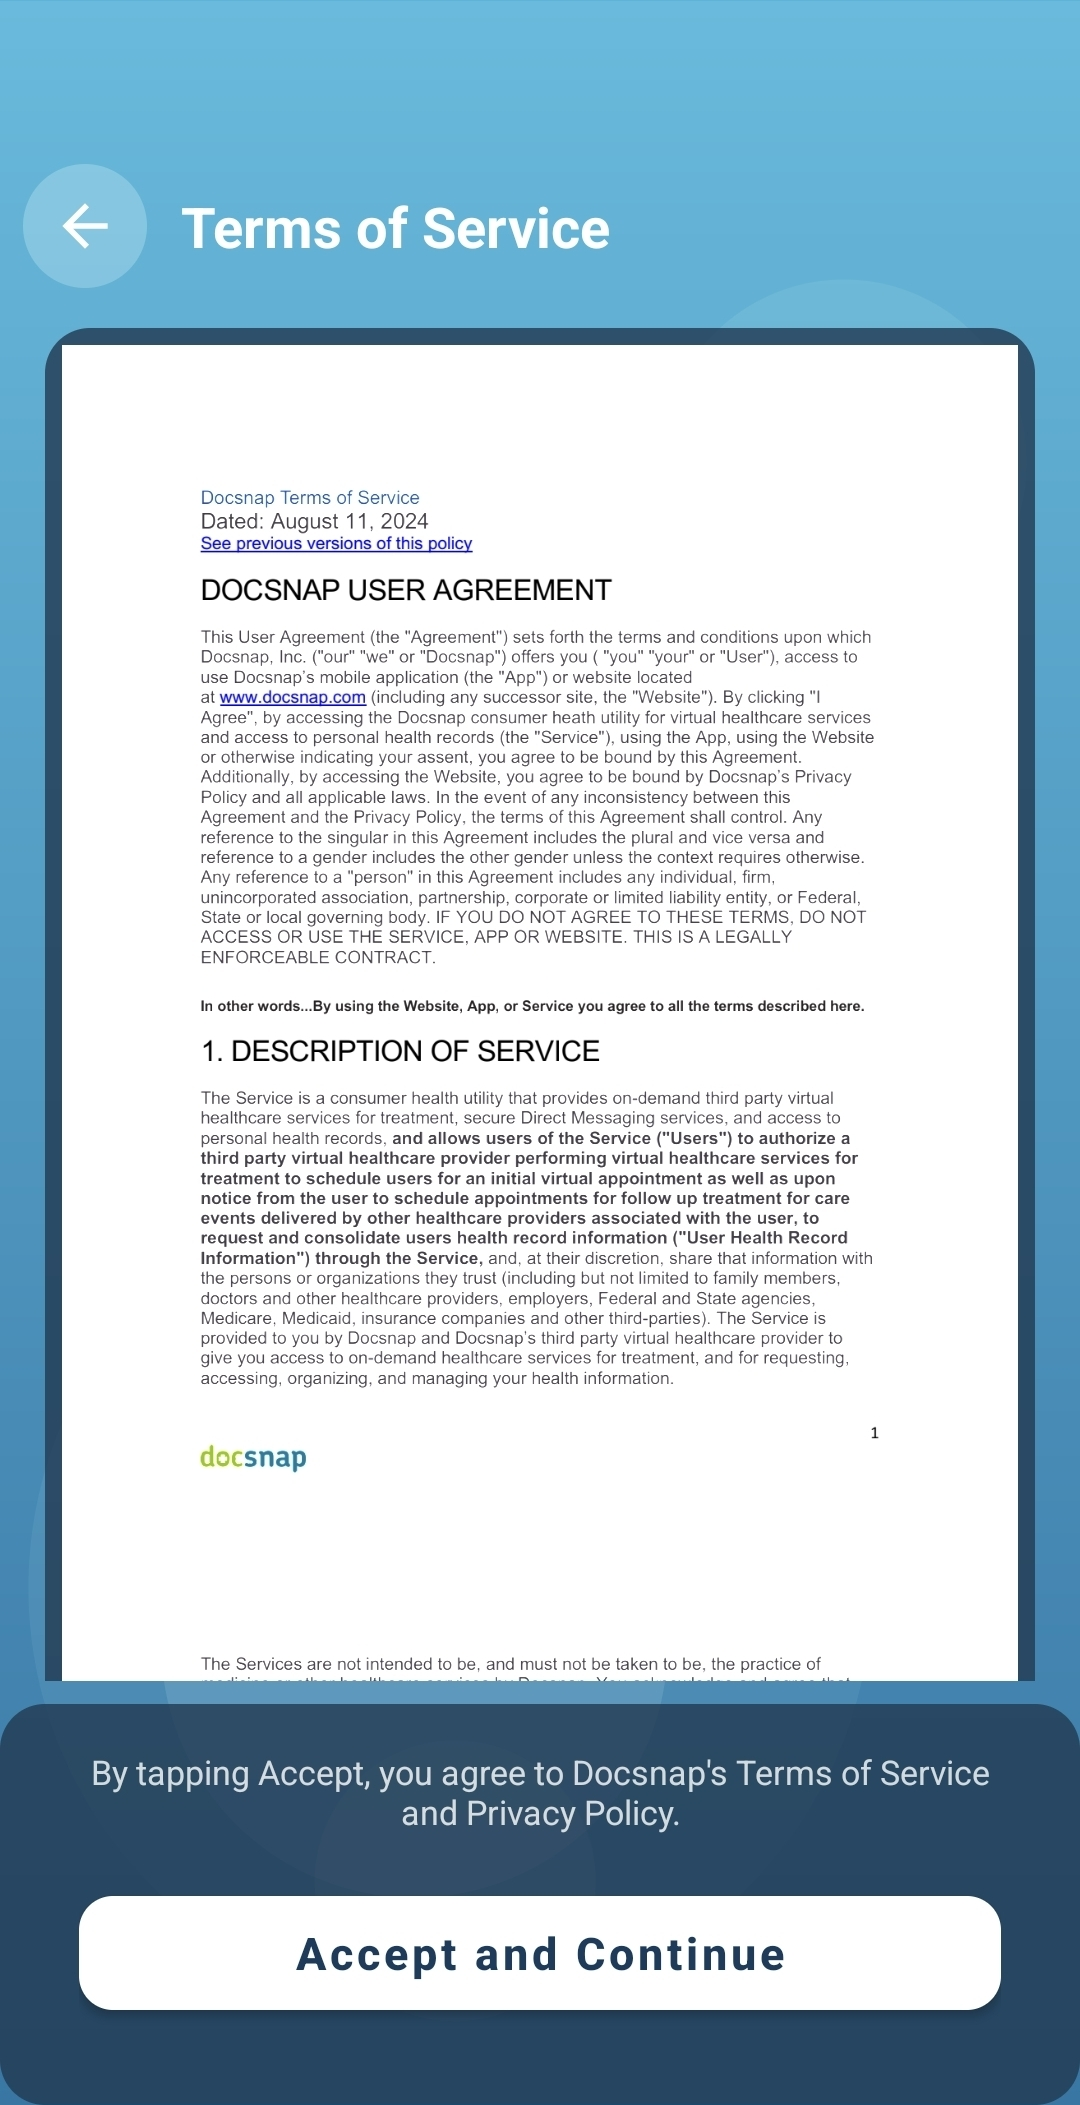
Accept the Terms of Service
Review the Docsnap Terms of Service, then tap Accept and Continue.
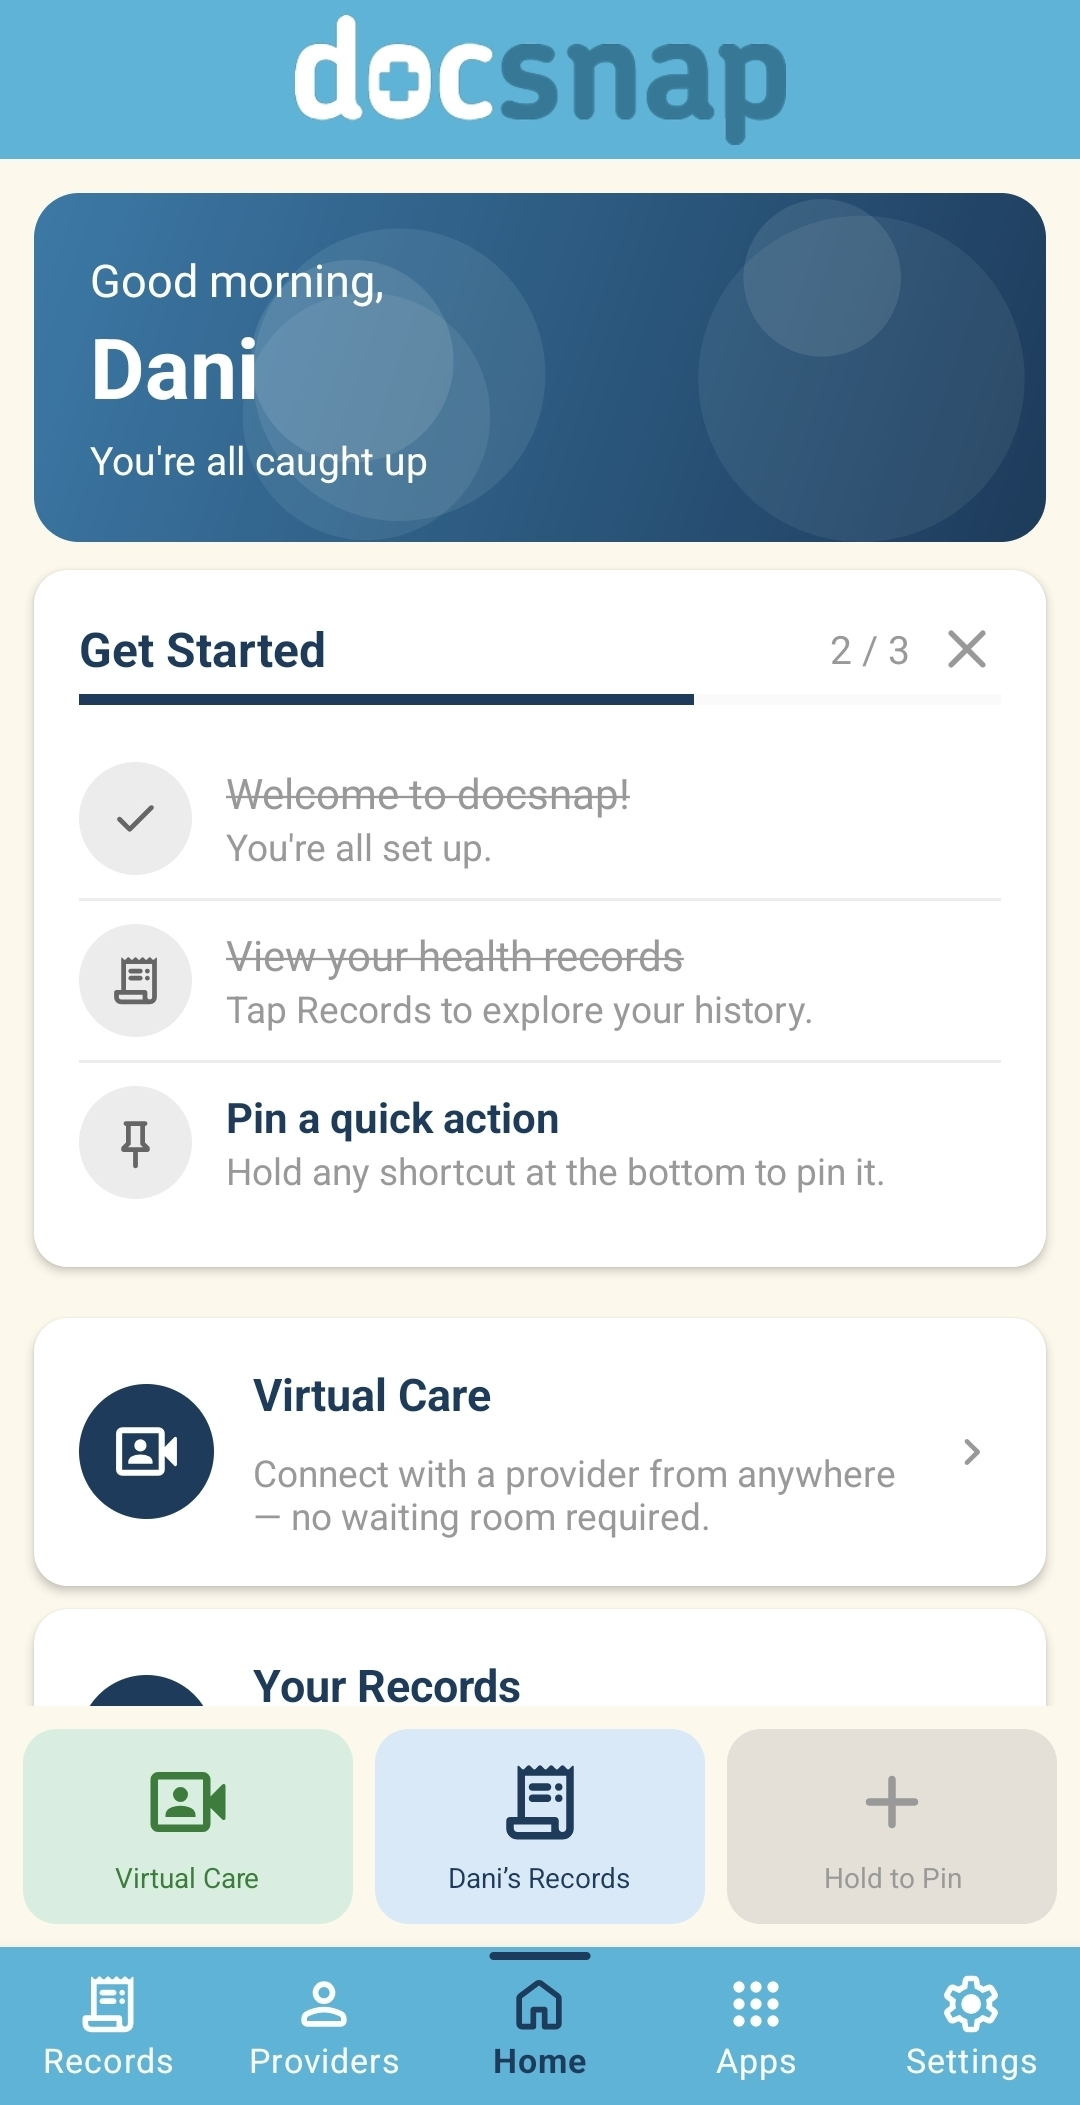
You're all set!
Congratulations! You have successfully completed your Docsnap onboarding process.
Common Tasks in Docsnap
Once you're onboarded, here's how to handle the things you'll do most often.
Update your records
Navigate to the Records tab on your Docsnap app.
- 1
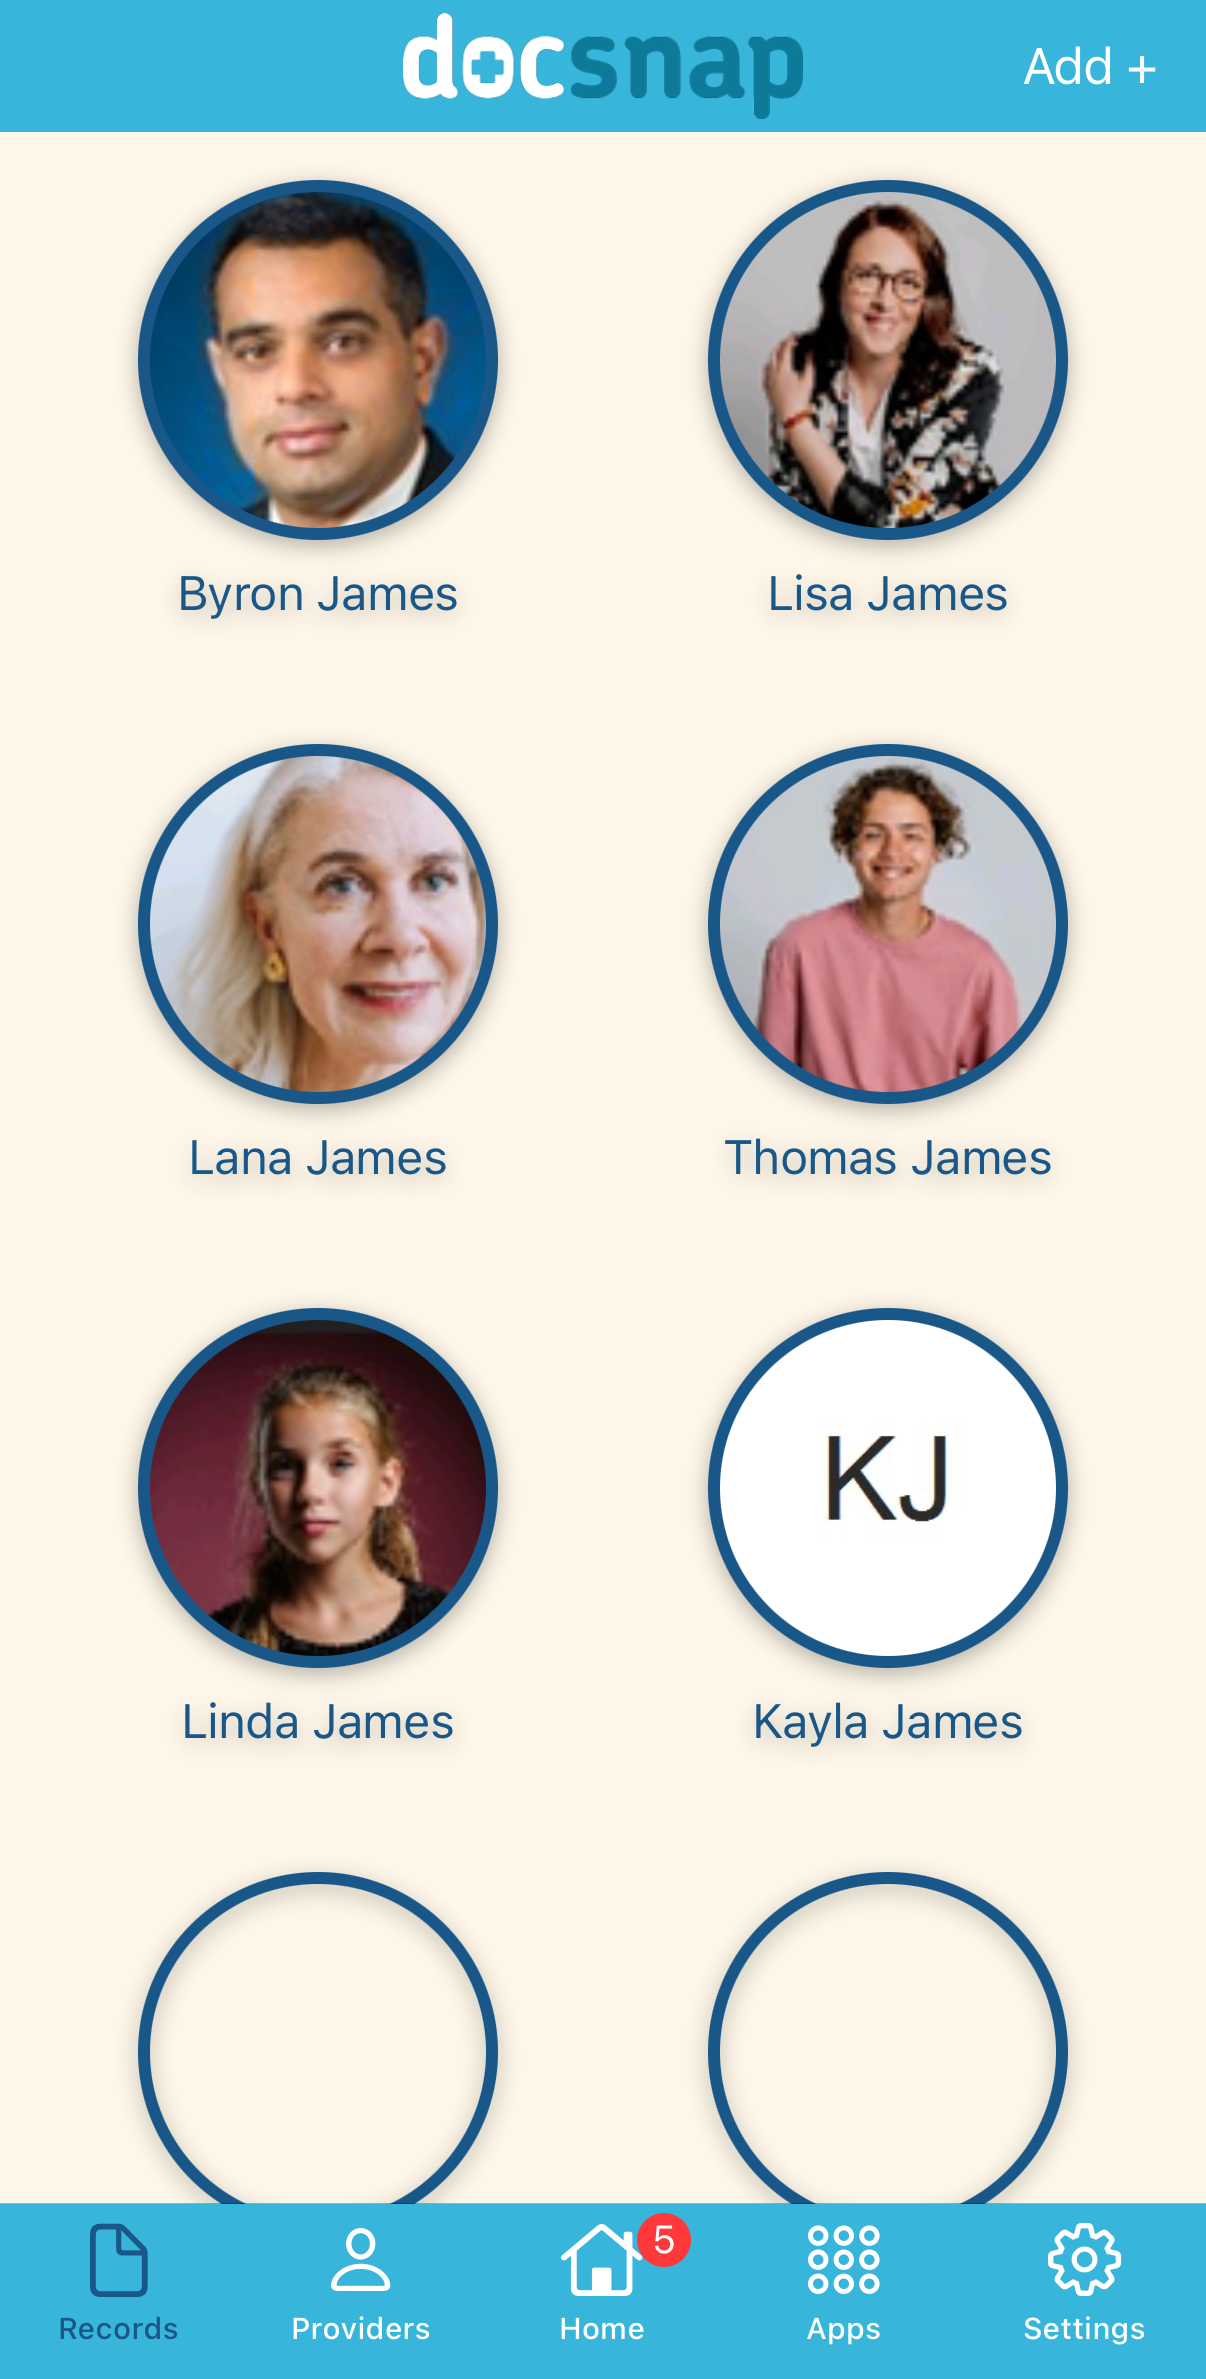
Tap your profile.
- 2
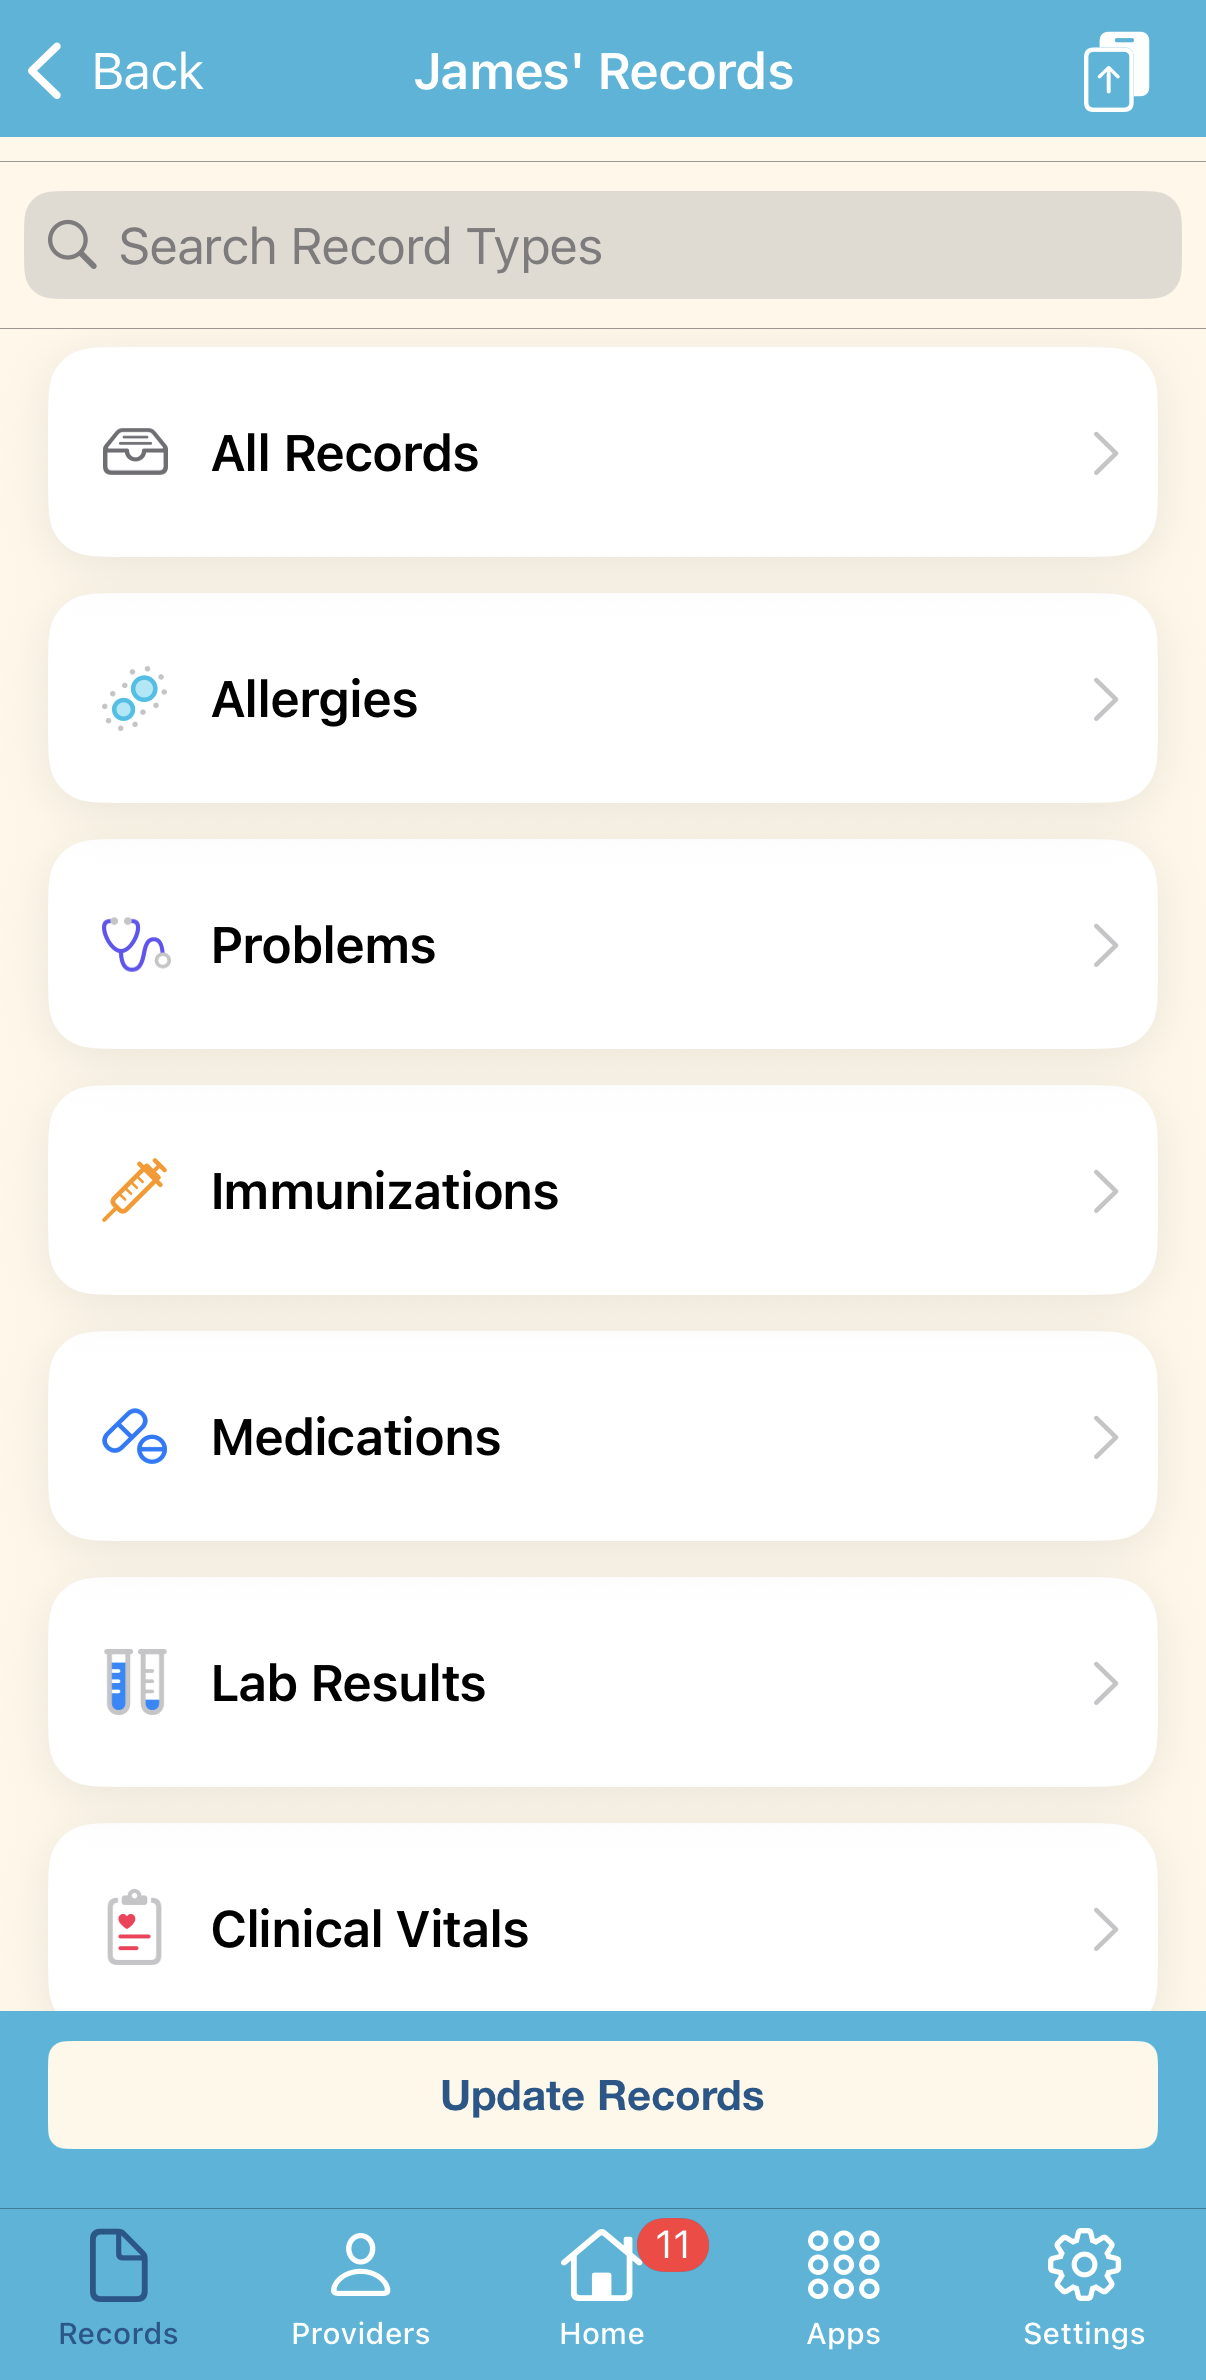
Tap Update records at the bottom.
- 3
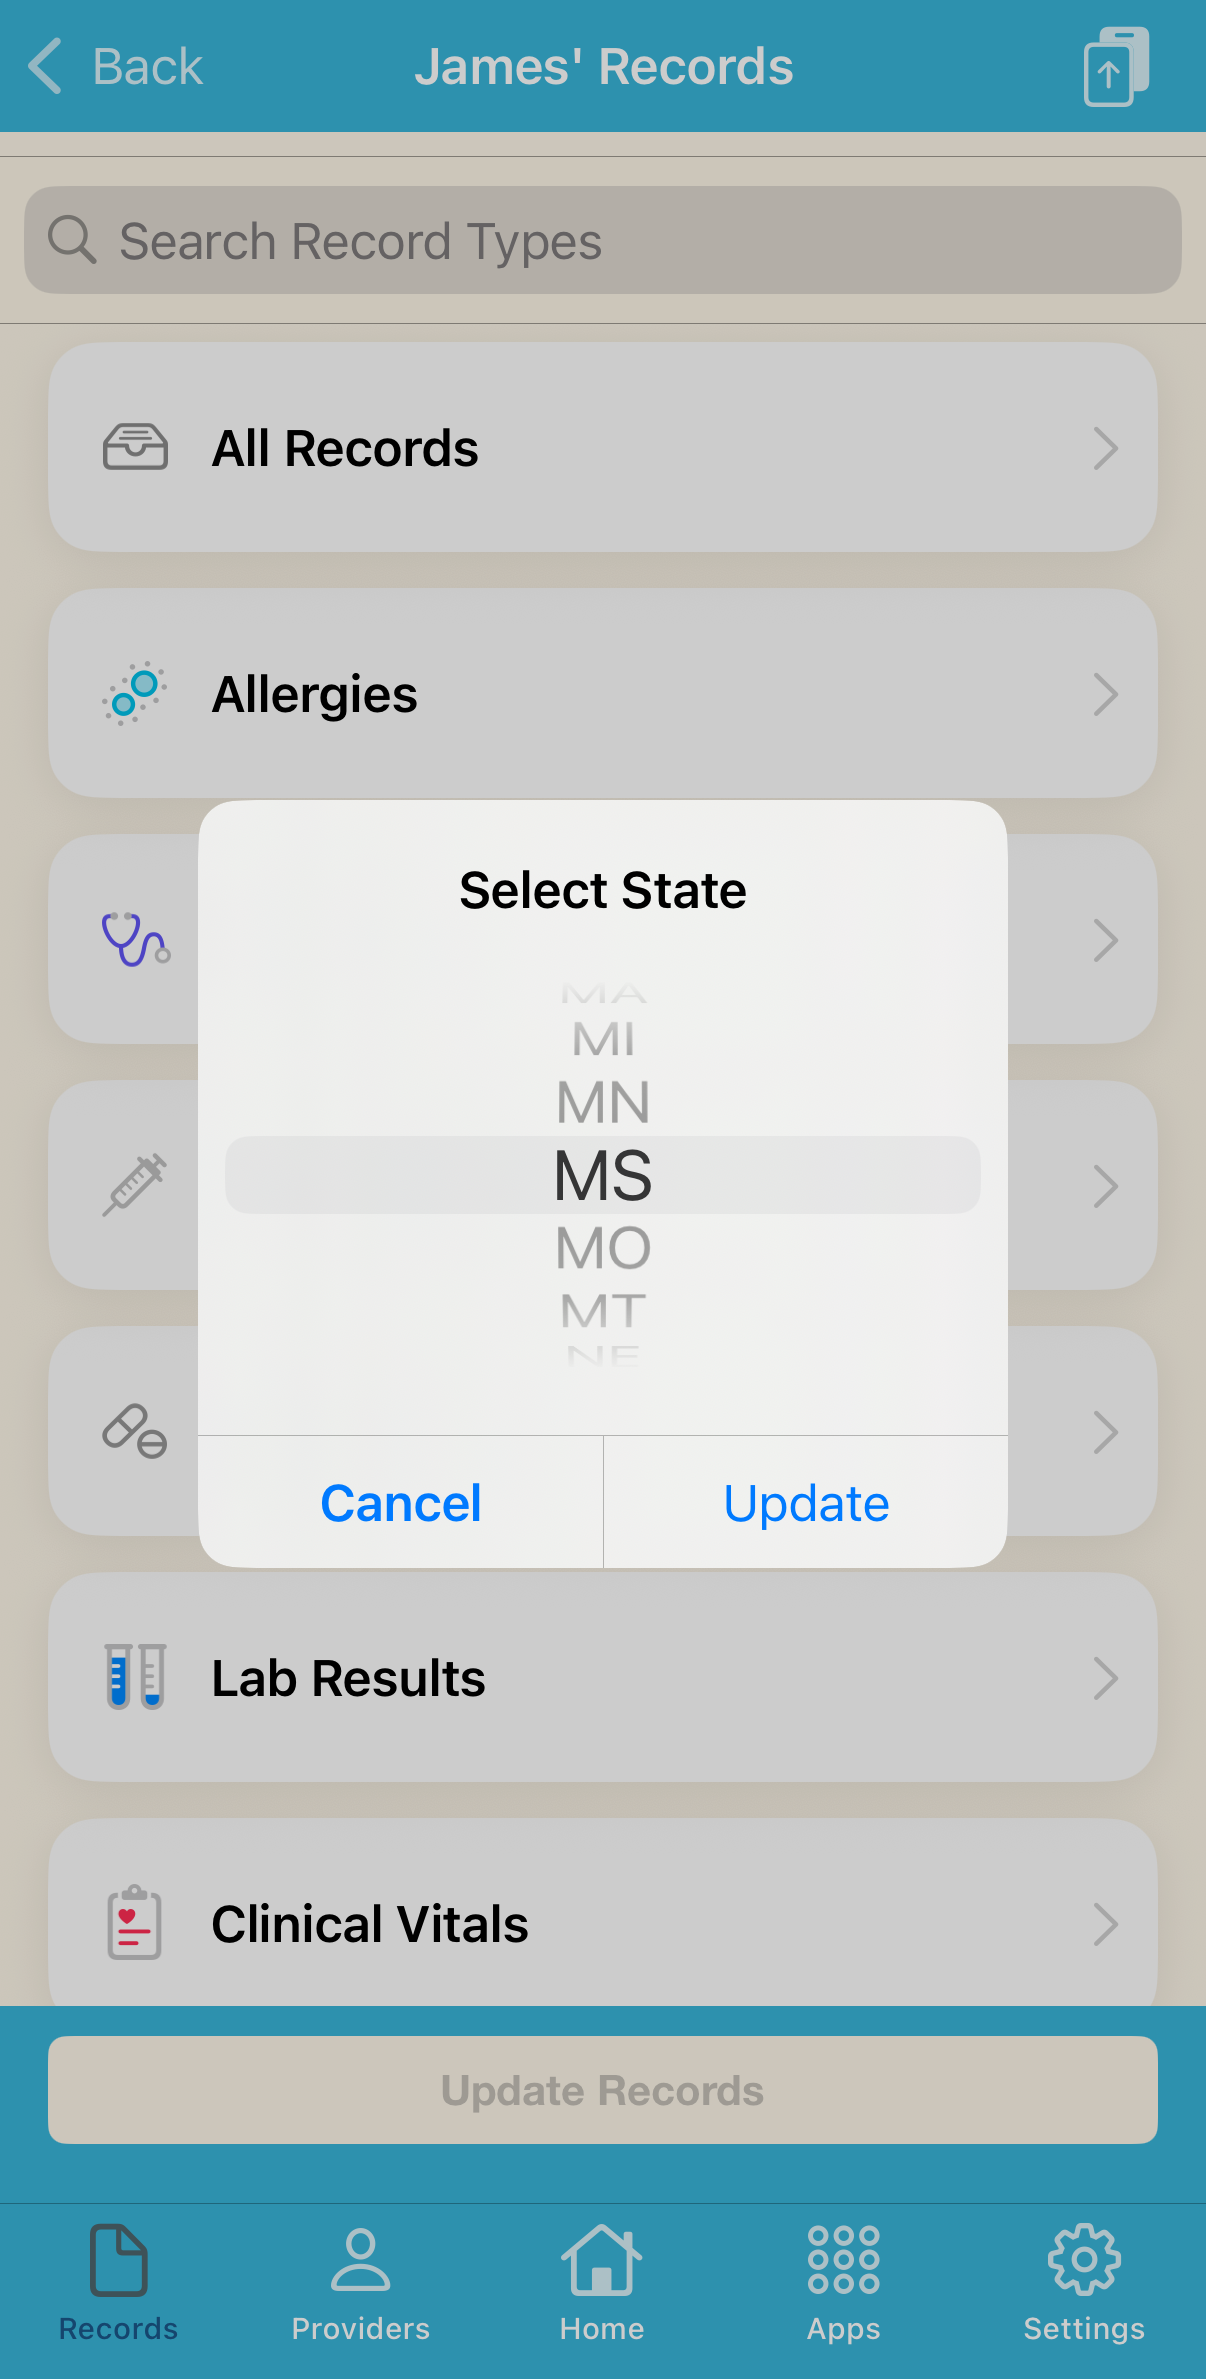
Select the state you'd like to query from. Tap Update and the record retrieval process will start. You'll be notified when your records are ready.
Start a virtual care visit
Virtual care is available 24/7.
- 1
Select Virtual Care on the Home tab.
- 2
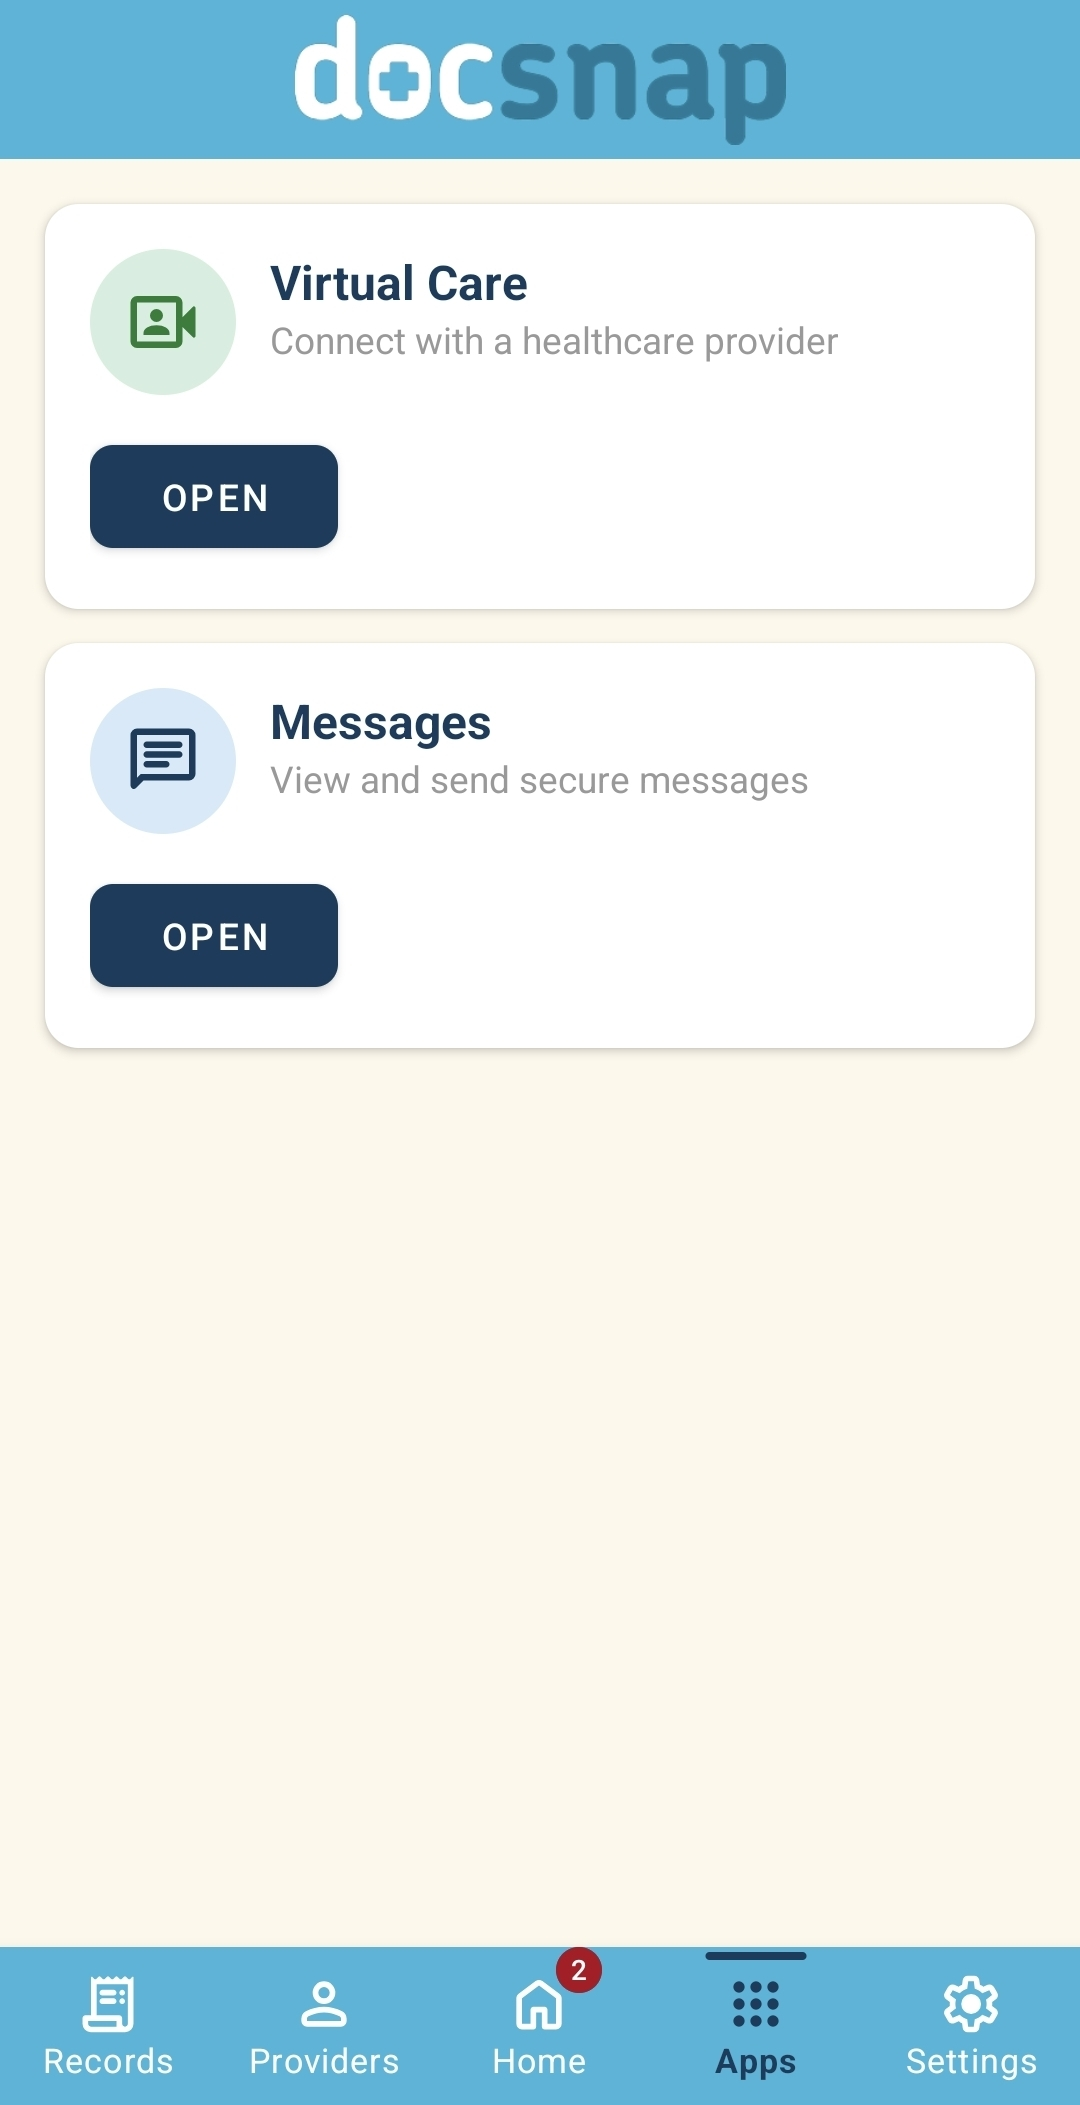
Alternatively, select Virtual Care on the Apps tab.
- 3
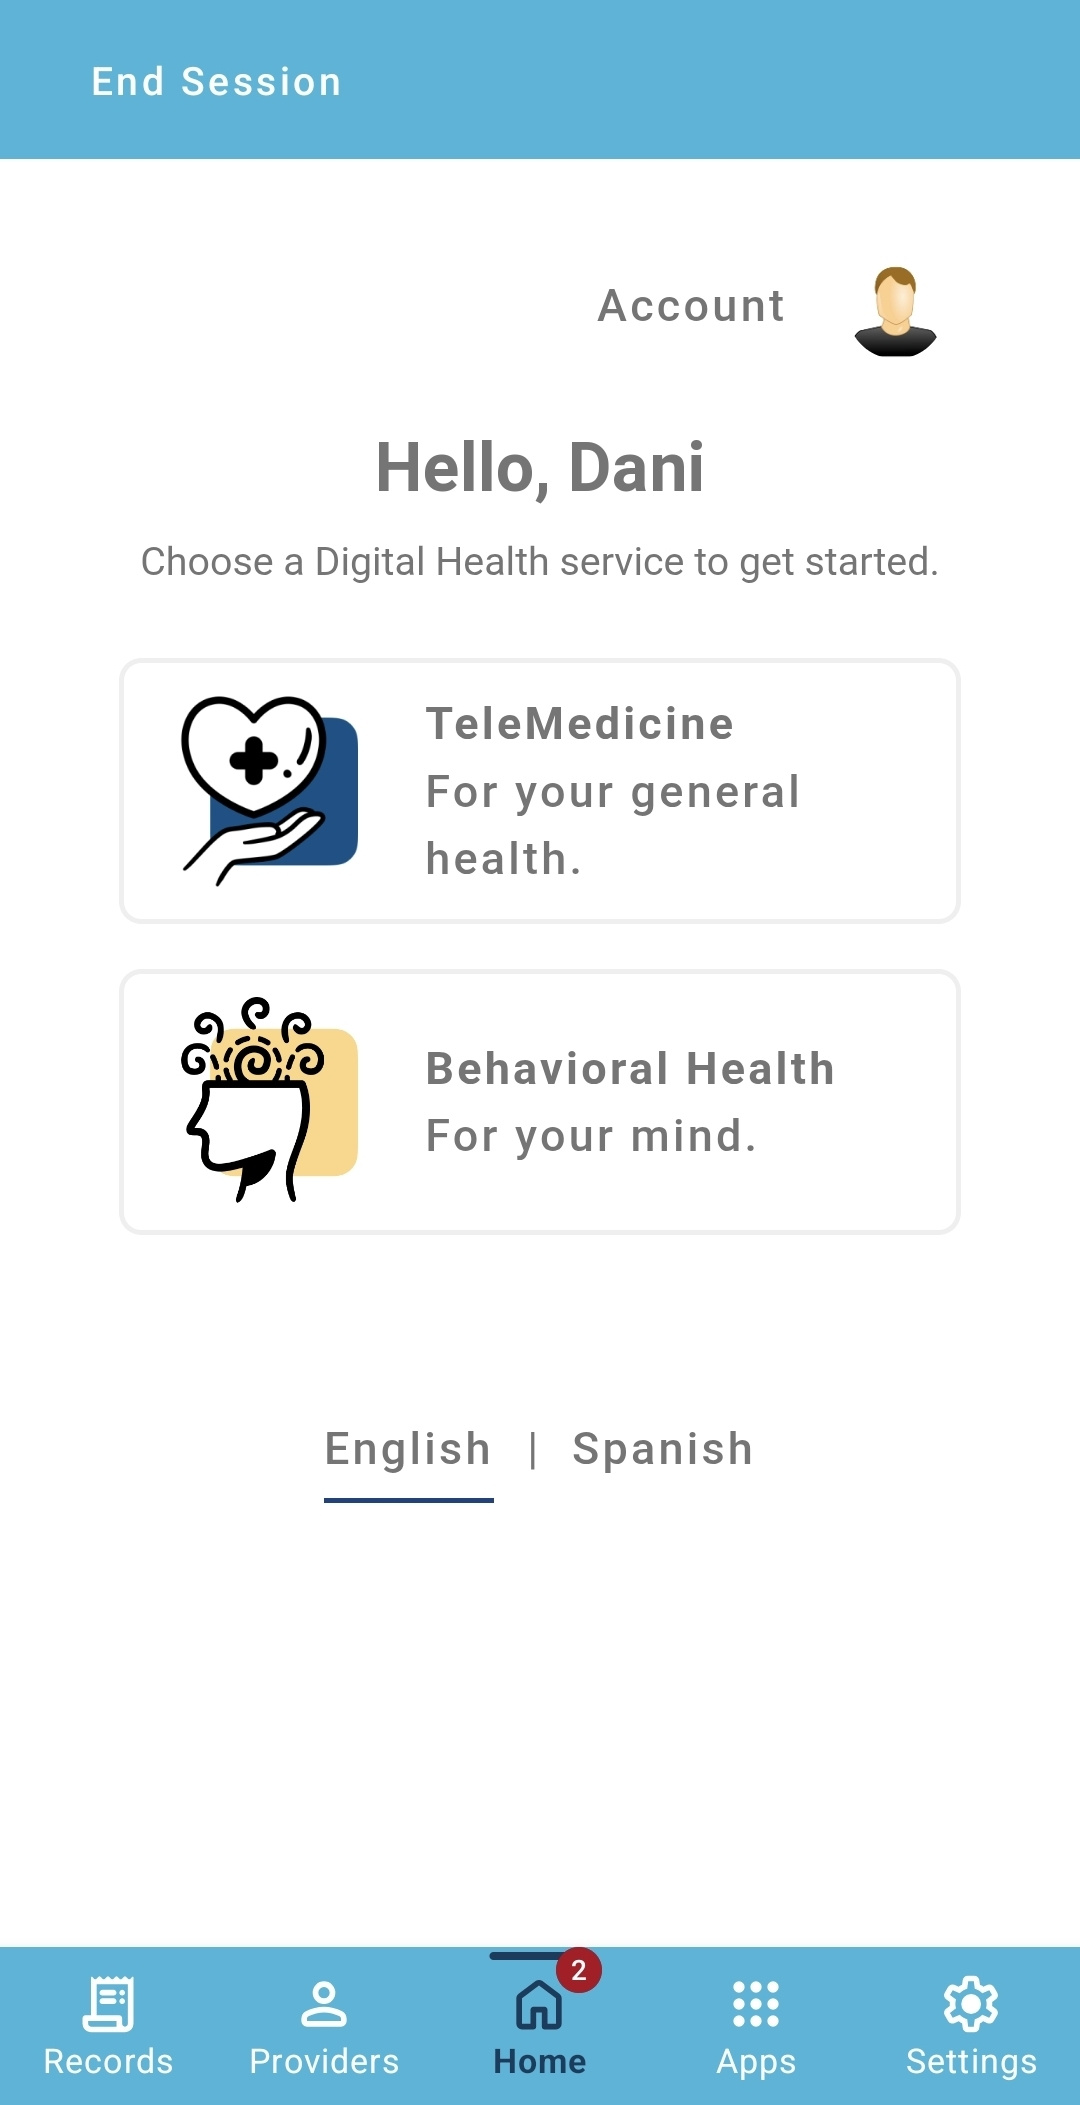
Choose who the visit is for and you'll be directed to your virtual care appointment.
Add a provider
Navigate to the Providers tab on your Docsnap app.
- 1
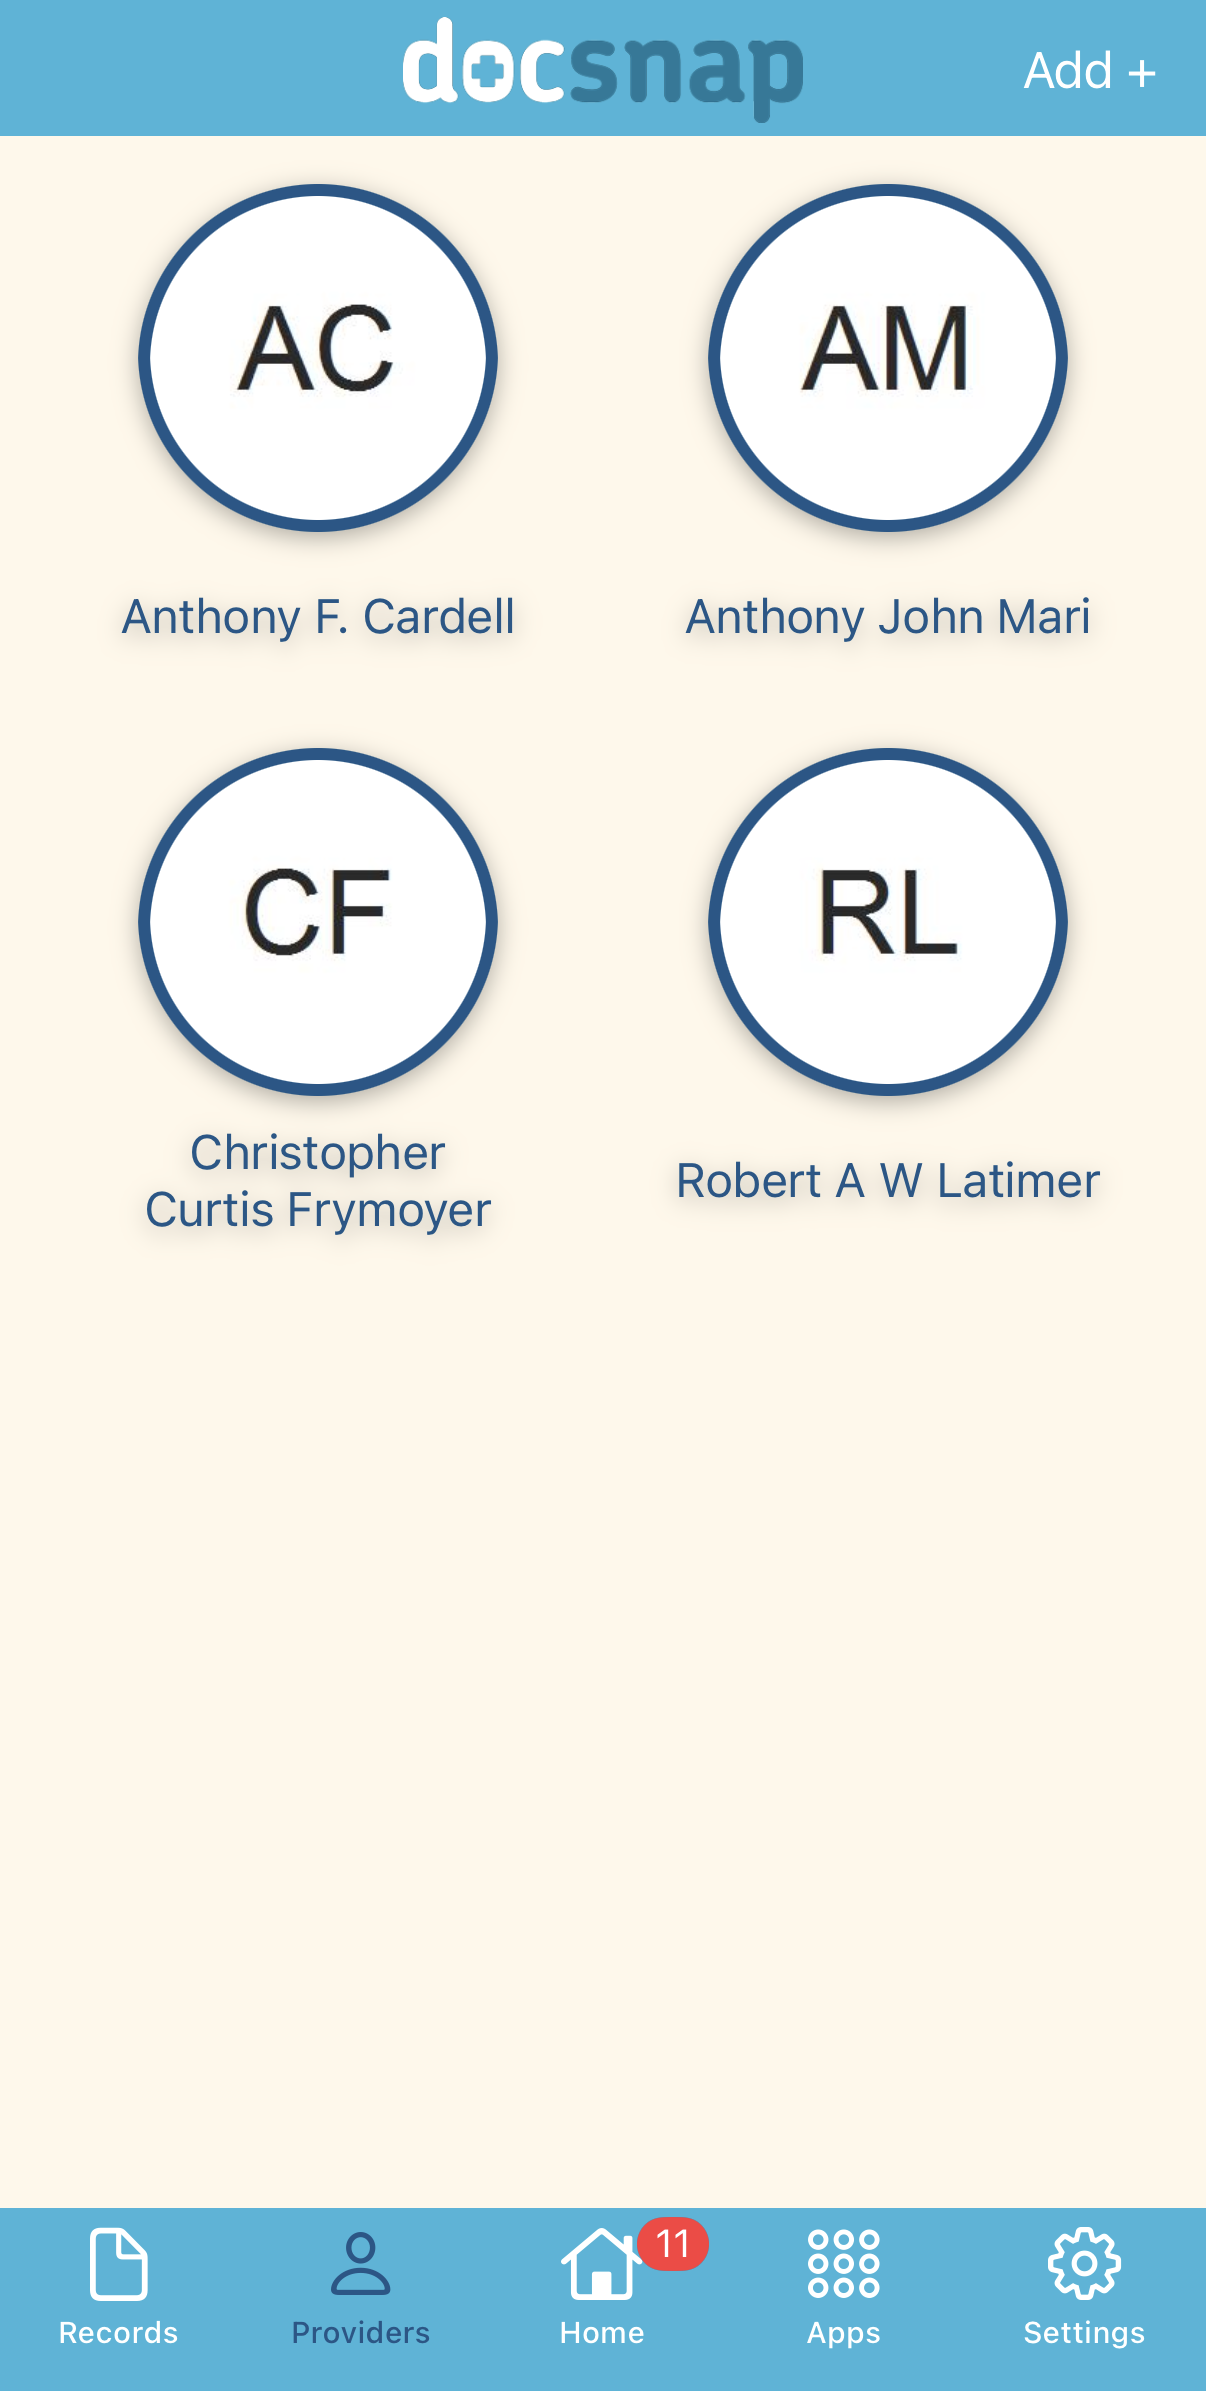
Tap the Add + button on the top-right corner.
- 2
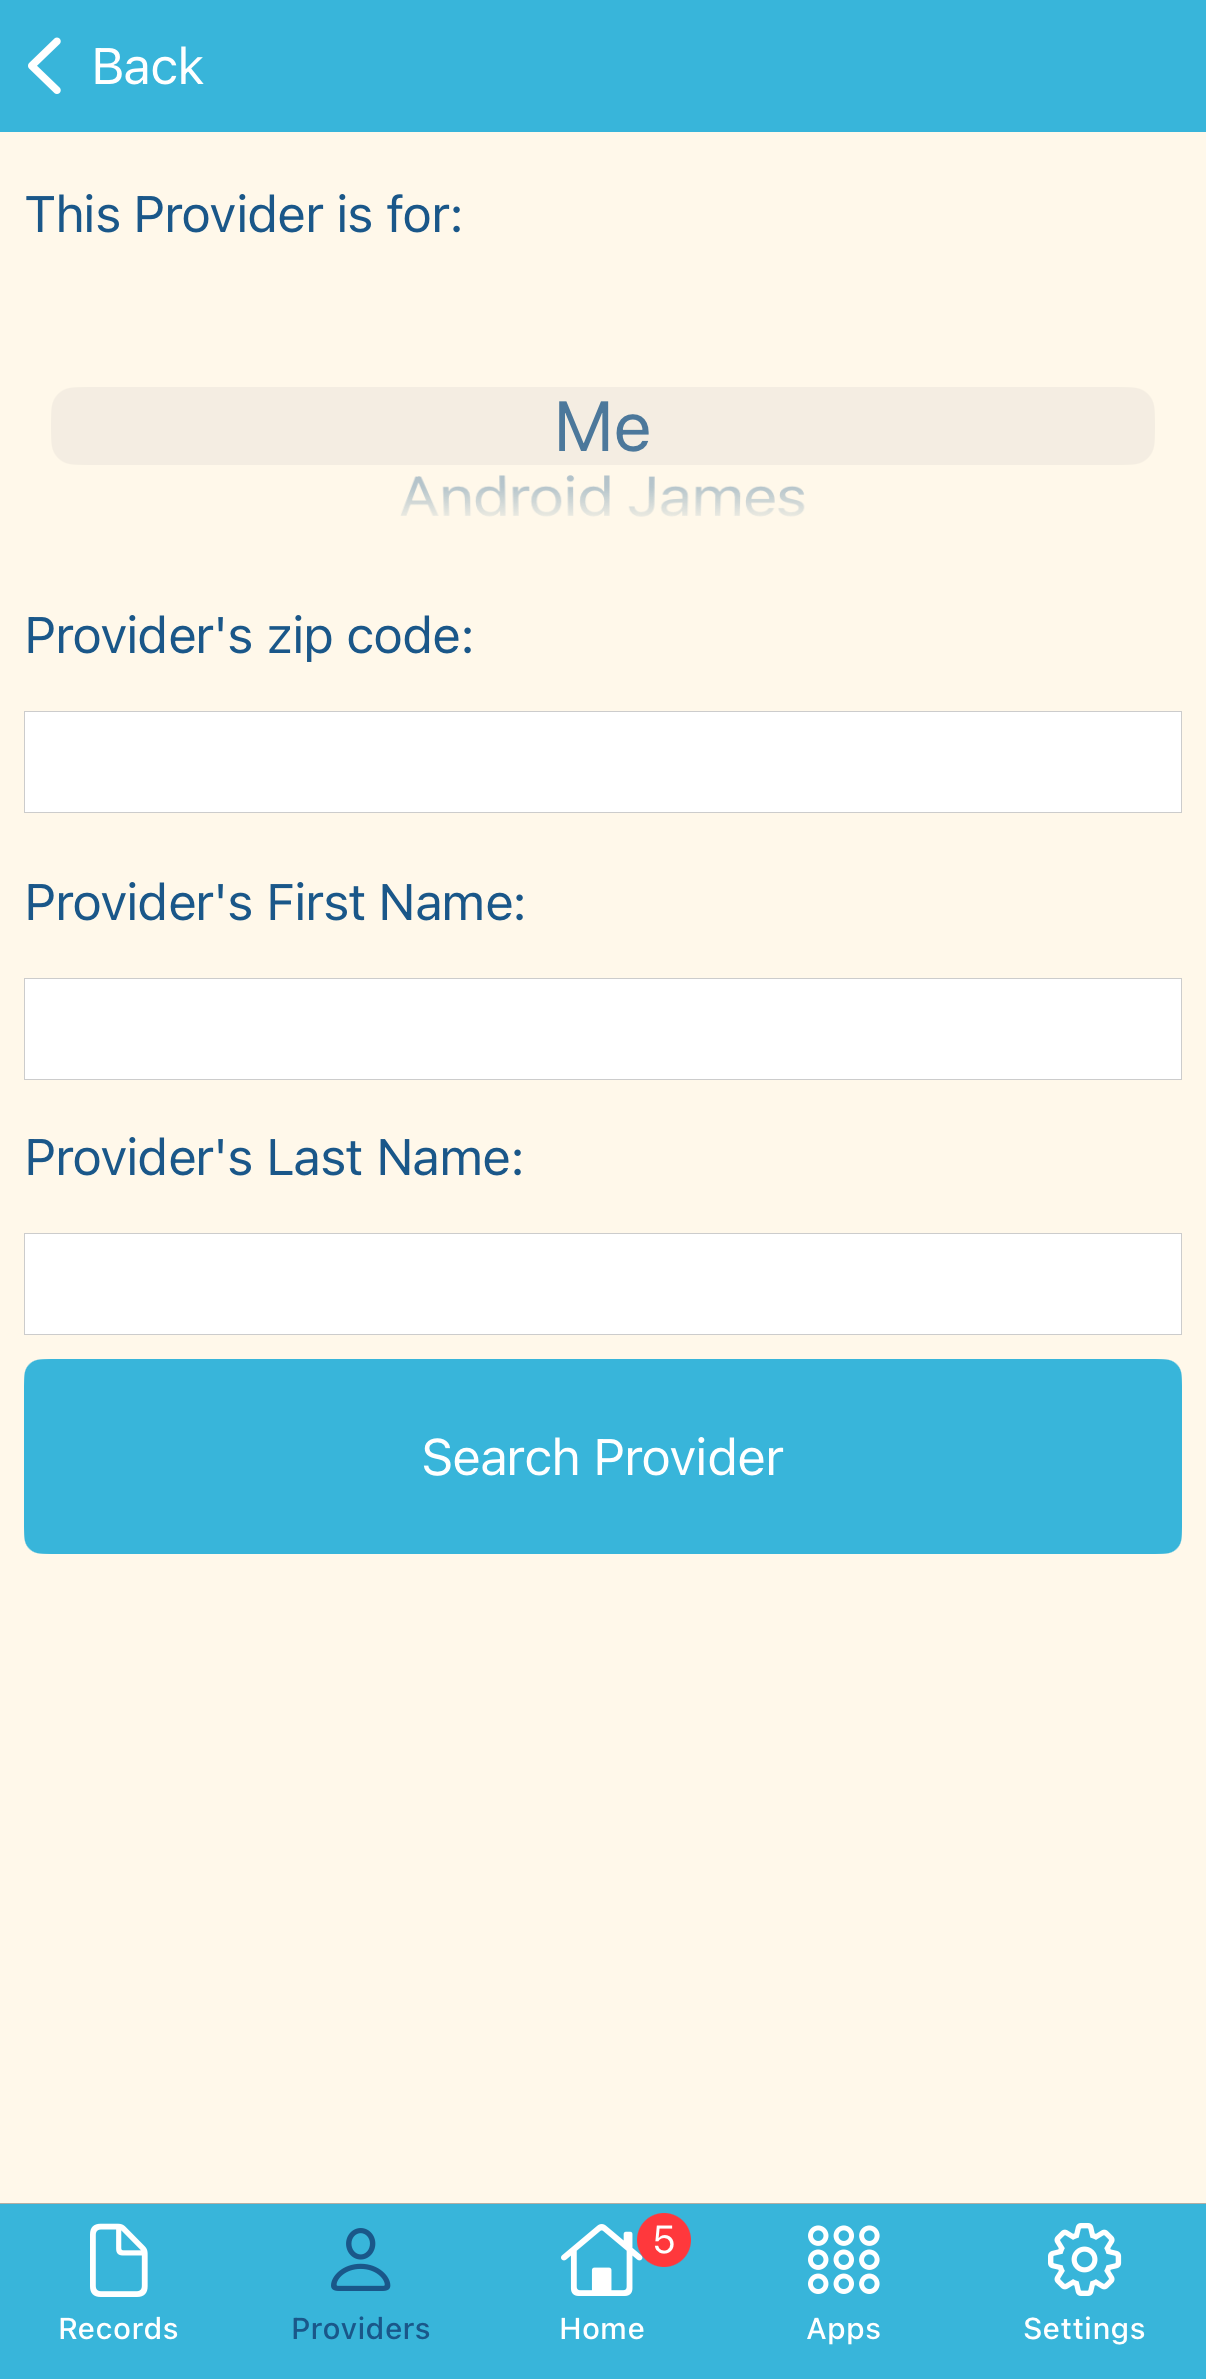
Enter your provider's first name, last name and zip code.
- 3
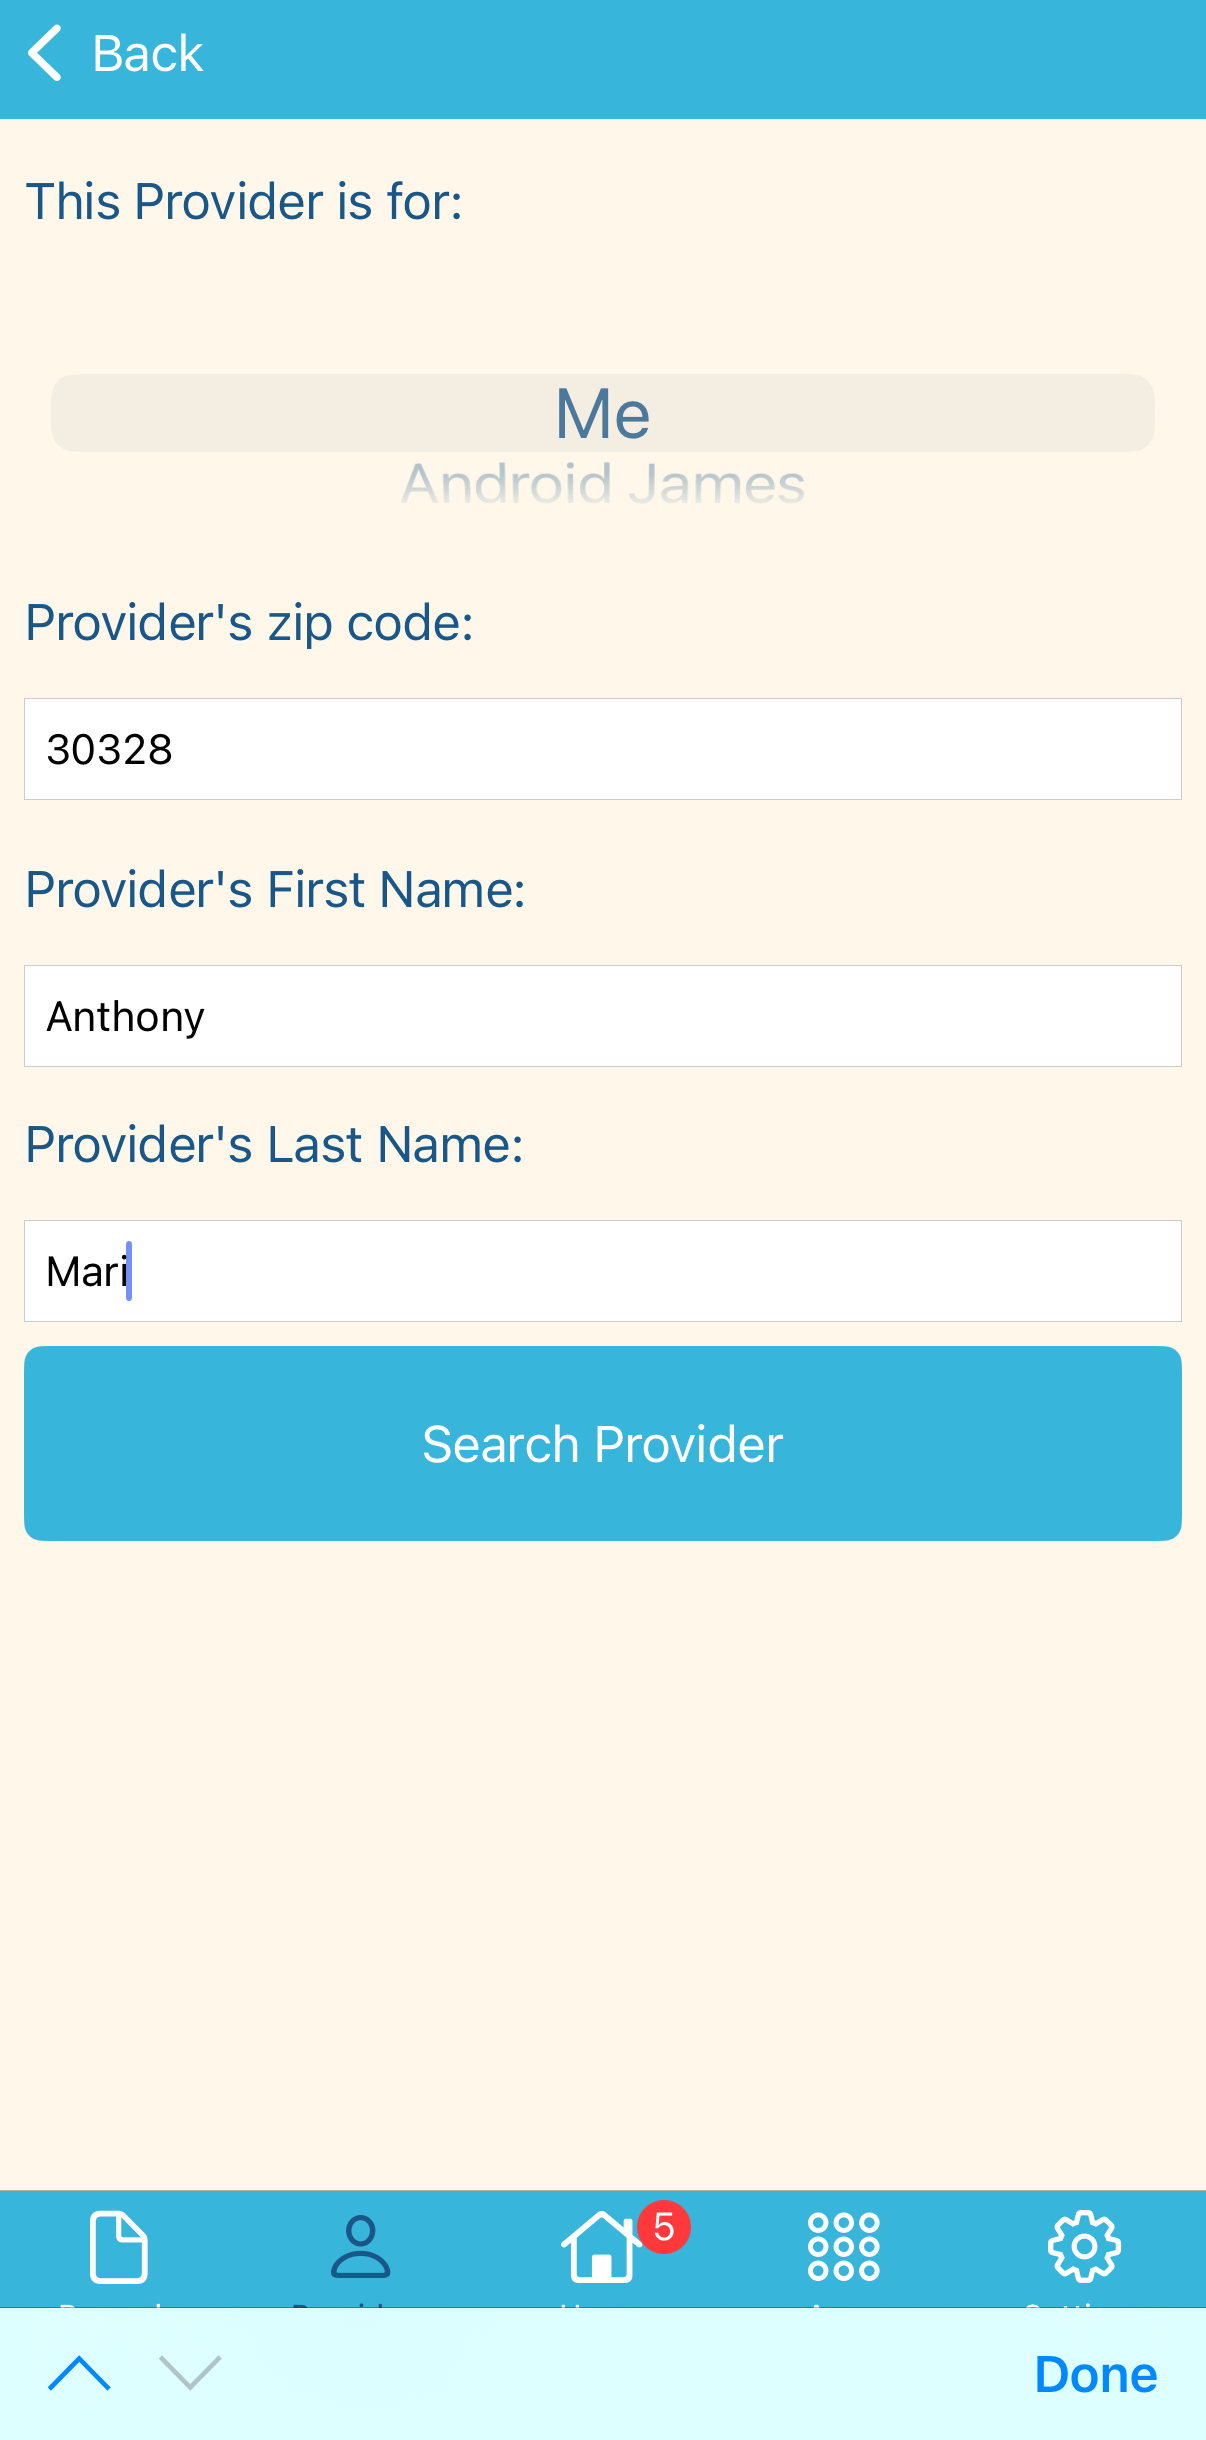
Tap Search Provider.
- 4
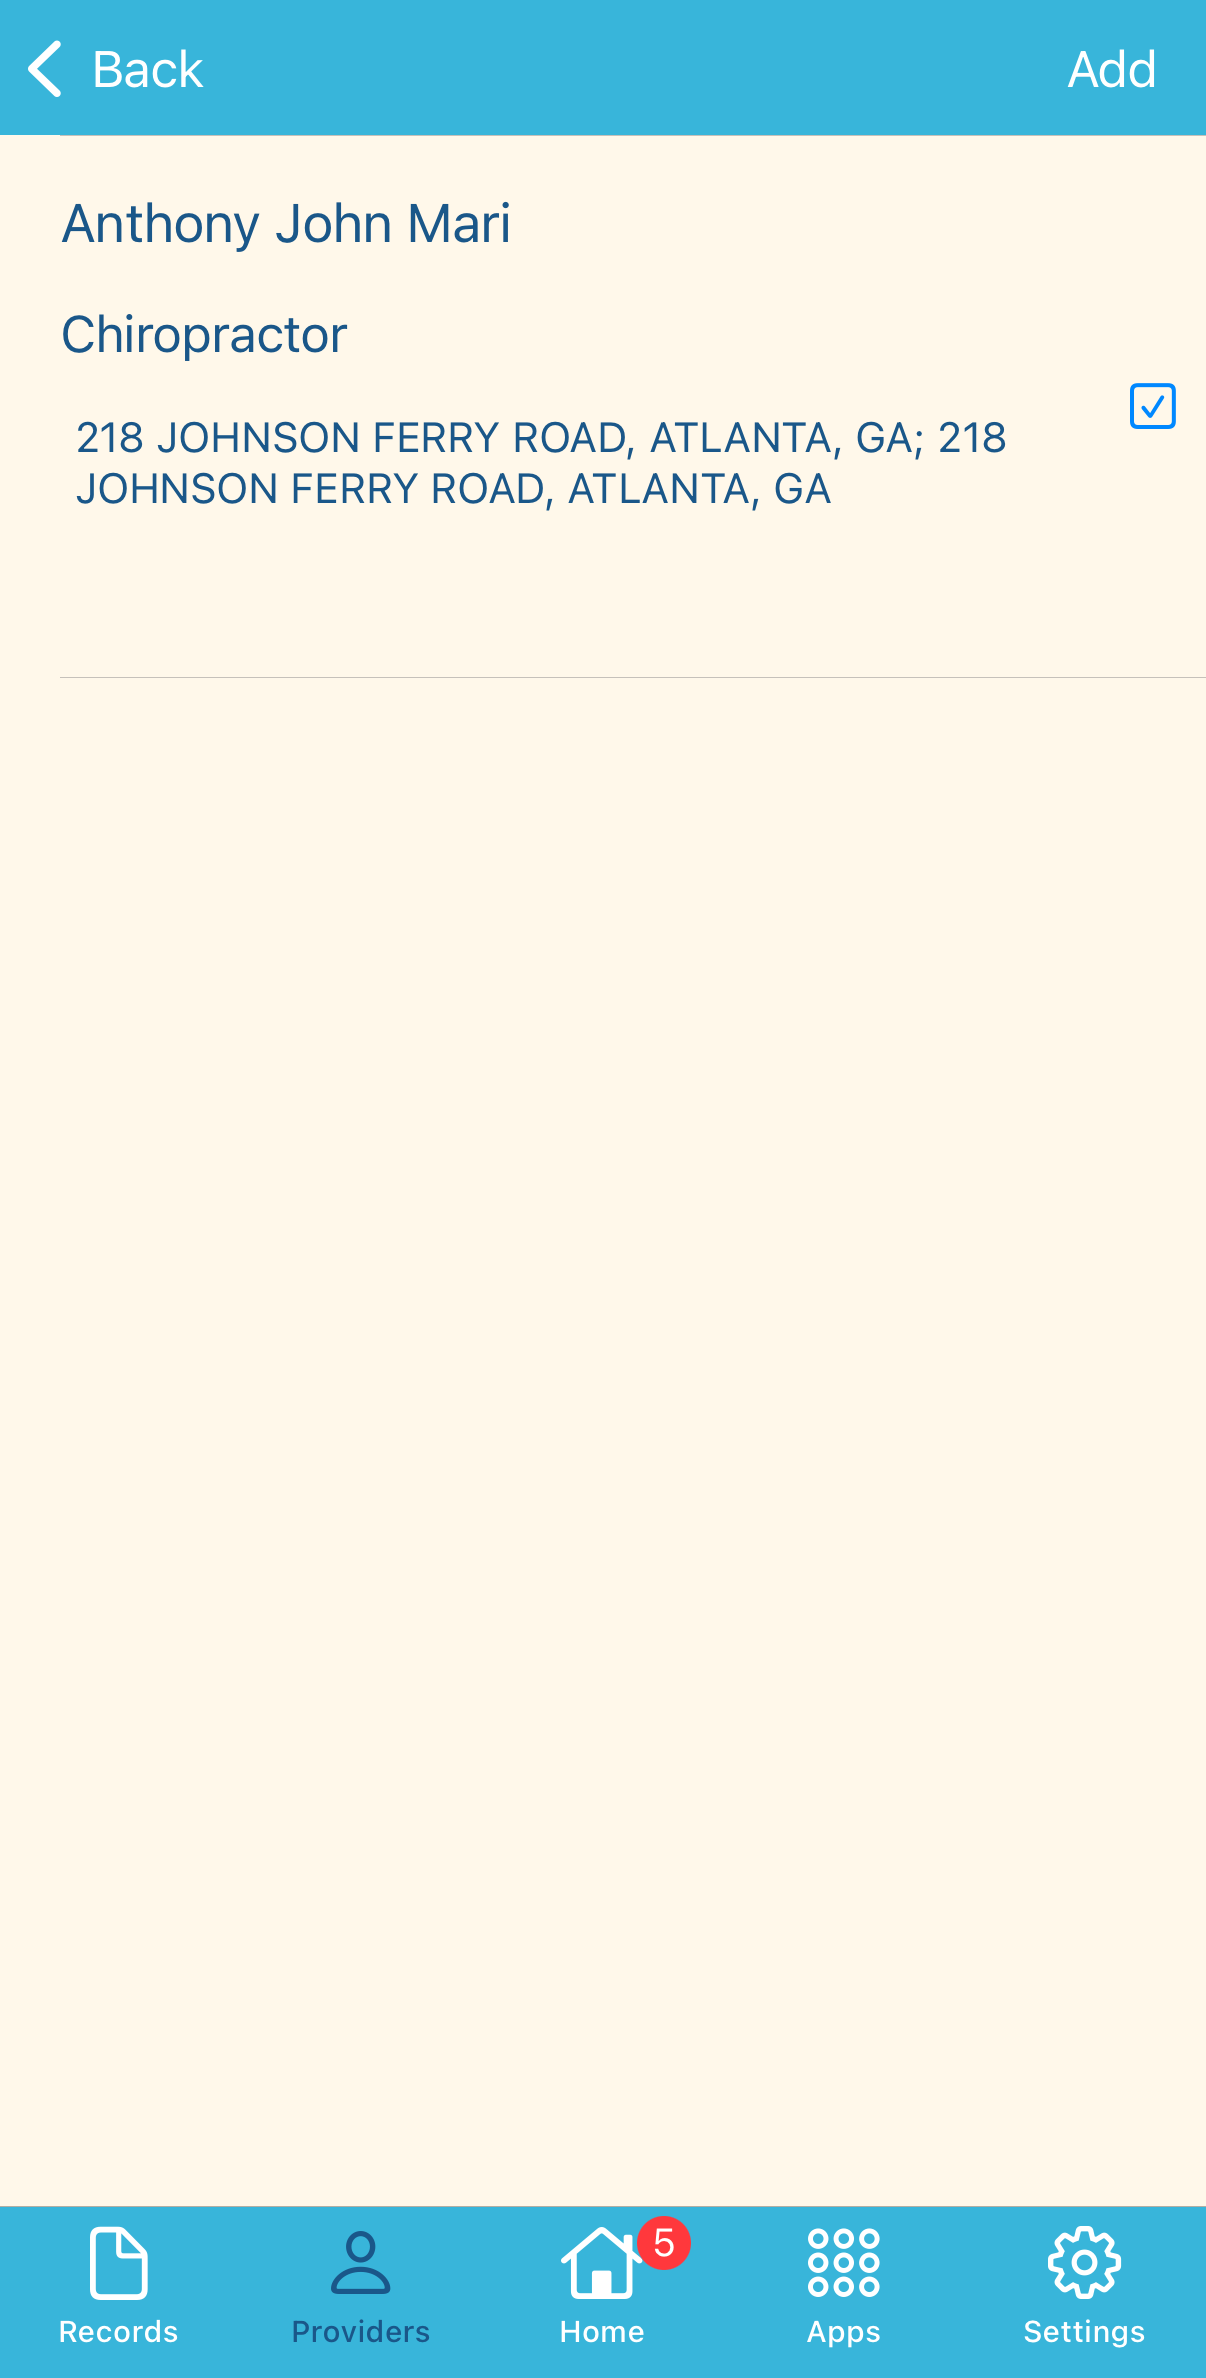
Tap the checkmark to select your desired provider. Tap Add to complete the process.
Share your records
Navigate to the Records tab on your Docsnap app.
- 1
Tap your profile.
- 2
Tap 'All Records'.
- 3
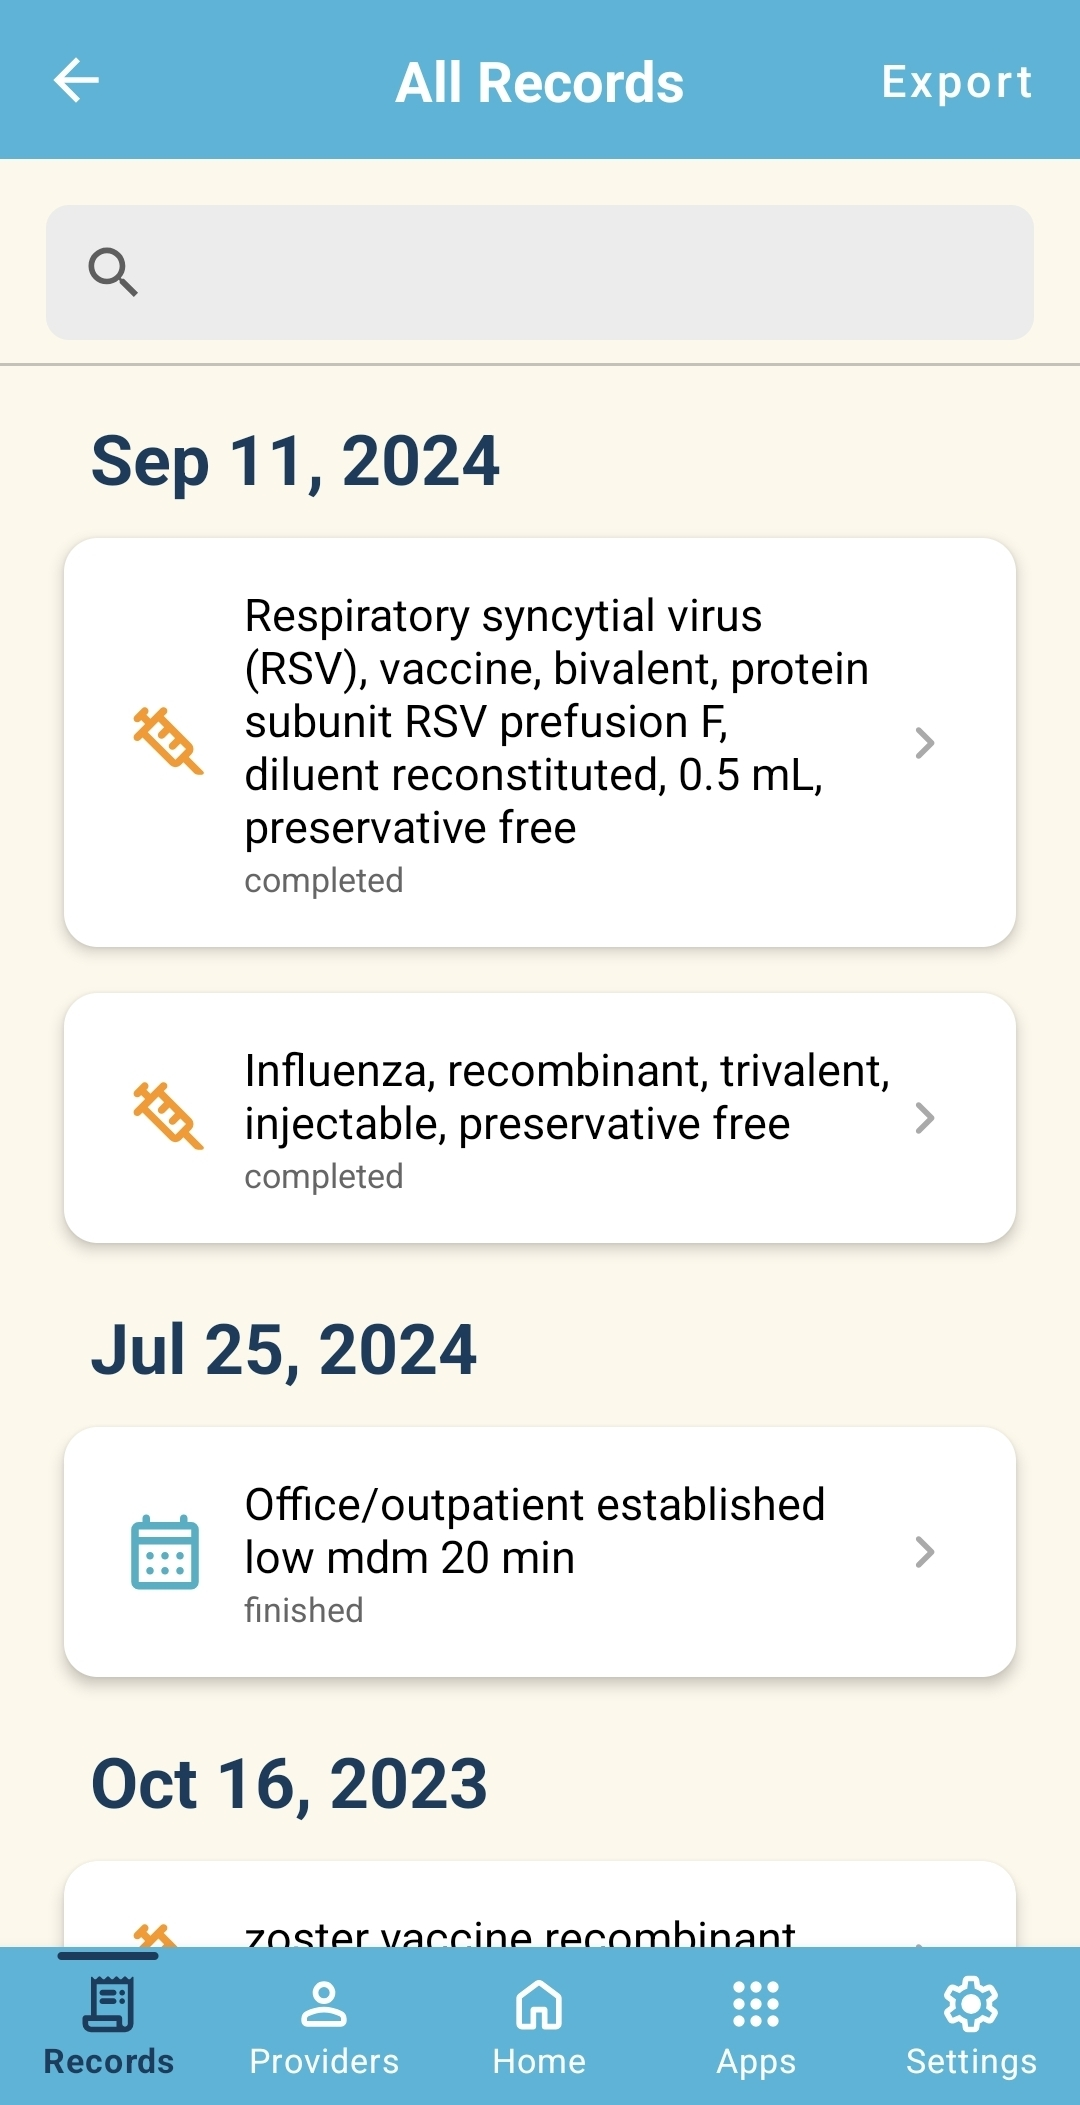
Tap 'Export' on the top-right corner to export a PDF view of your records.
- 4
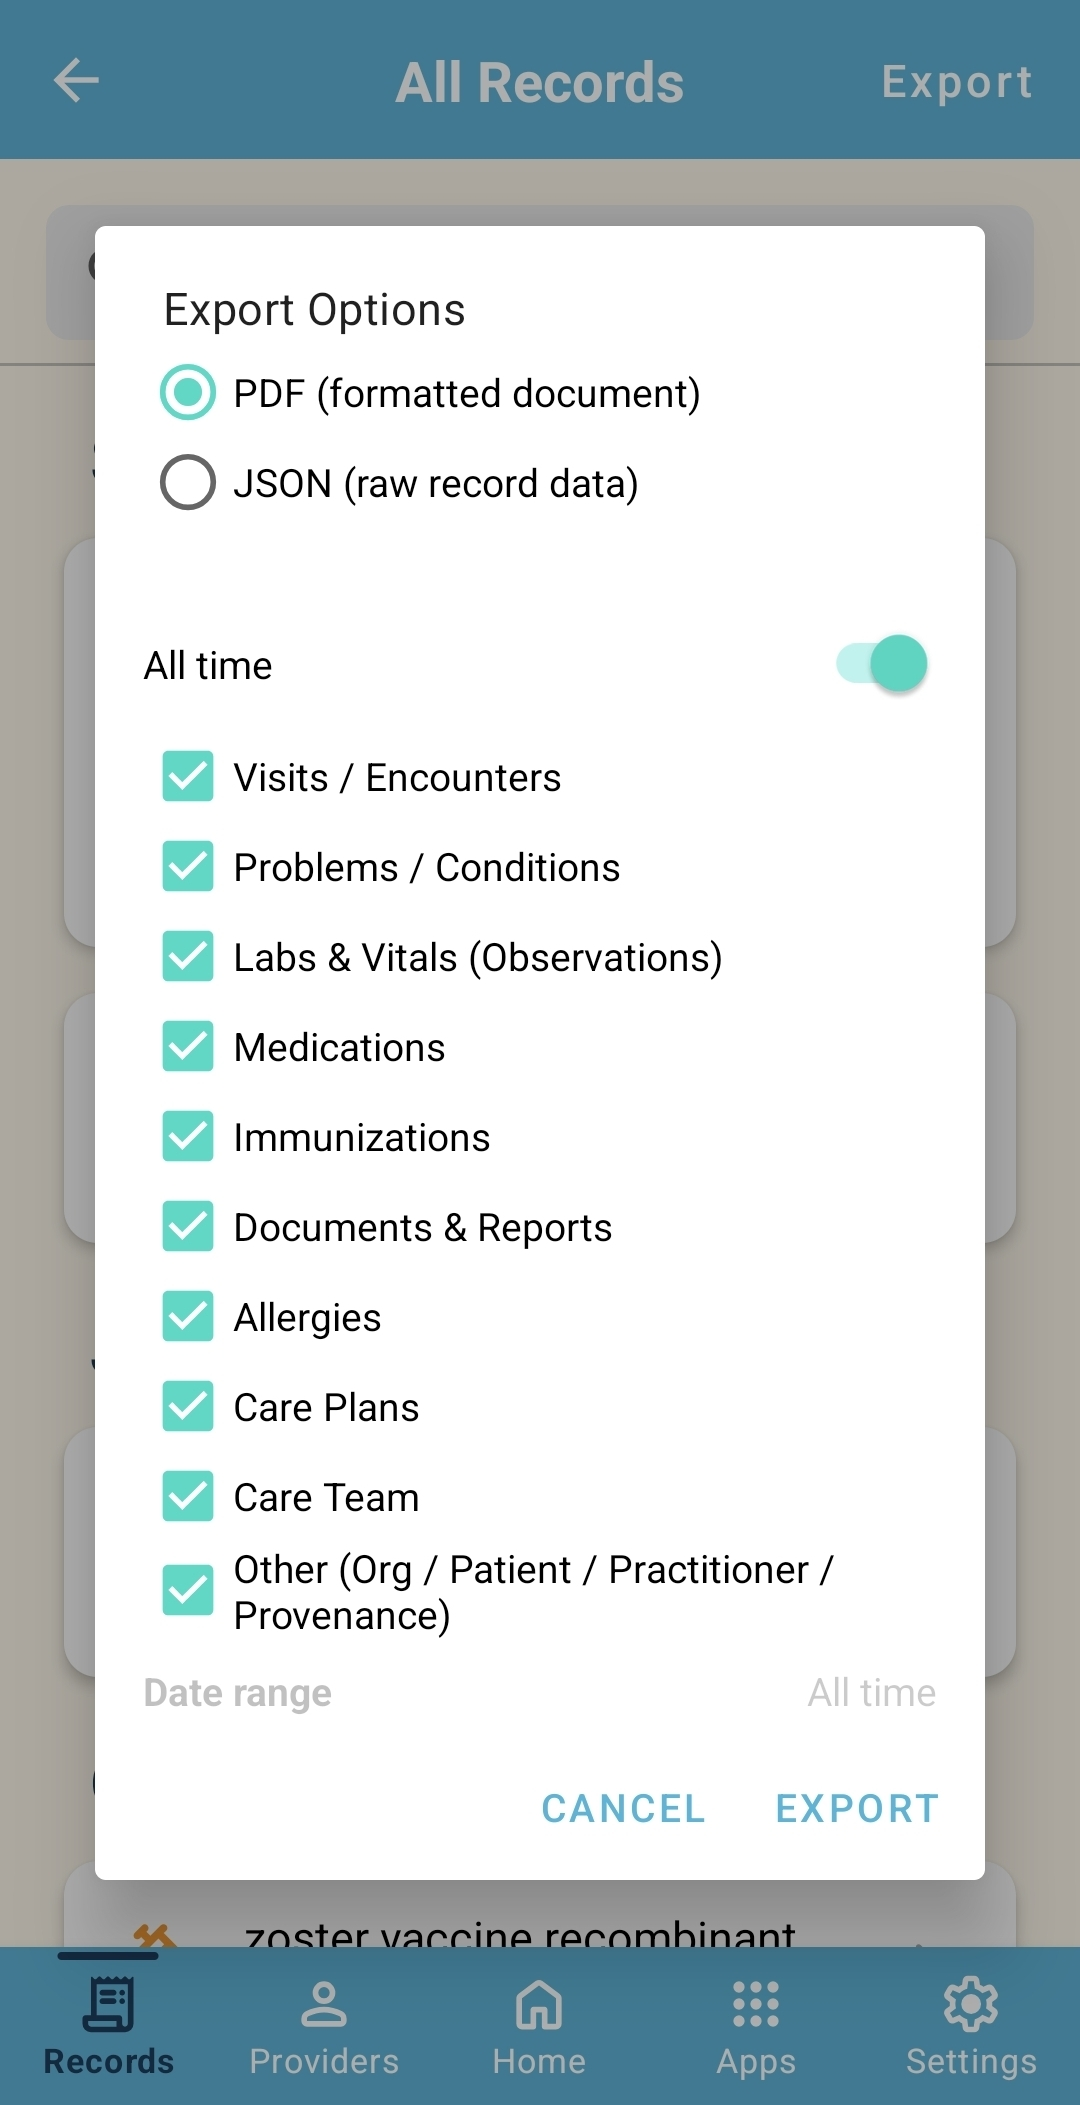
You may choose which sections and date range to include in your exported PDF.
- 5
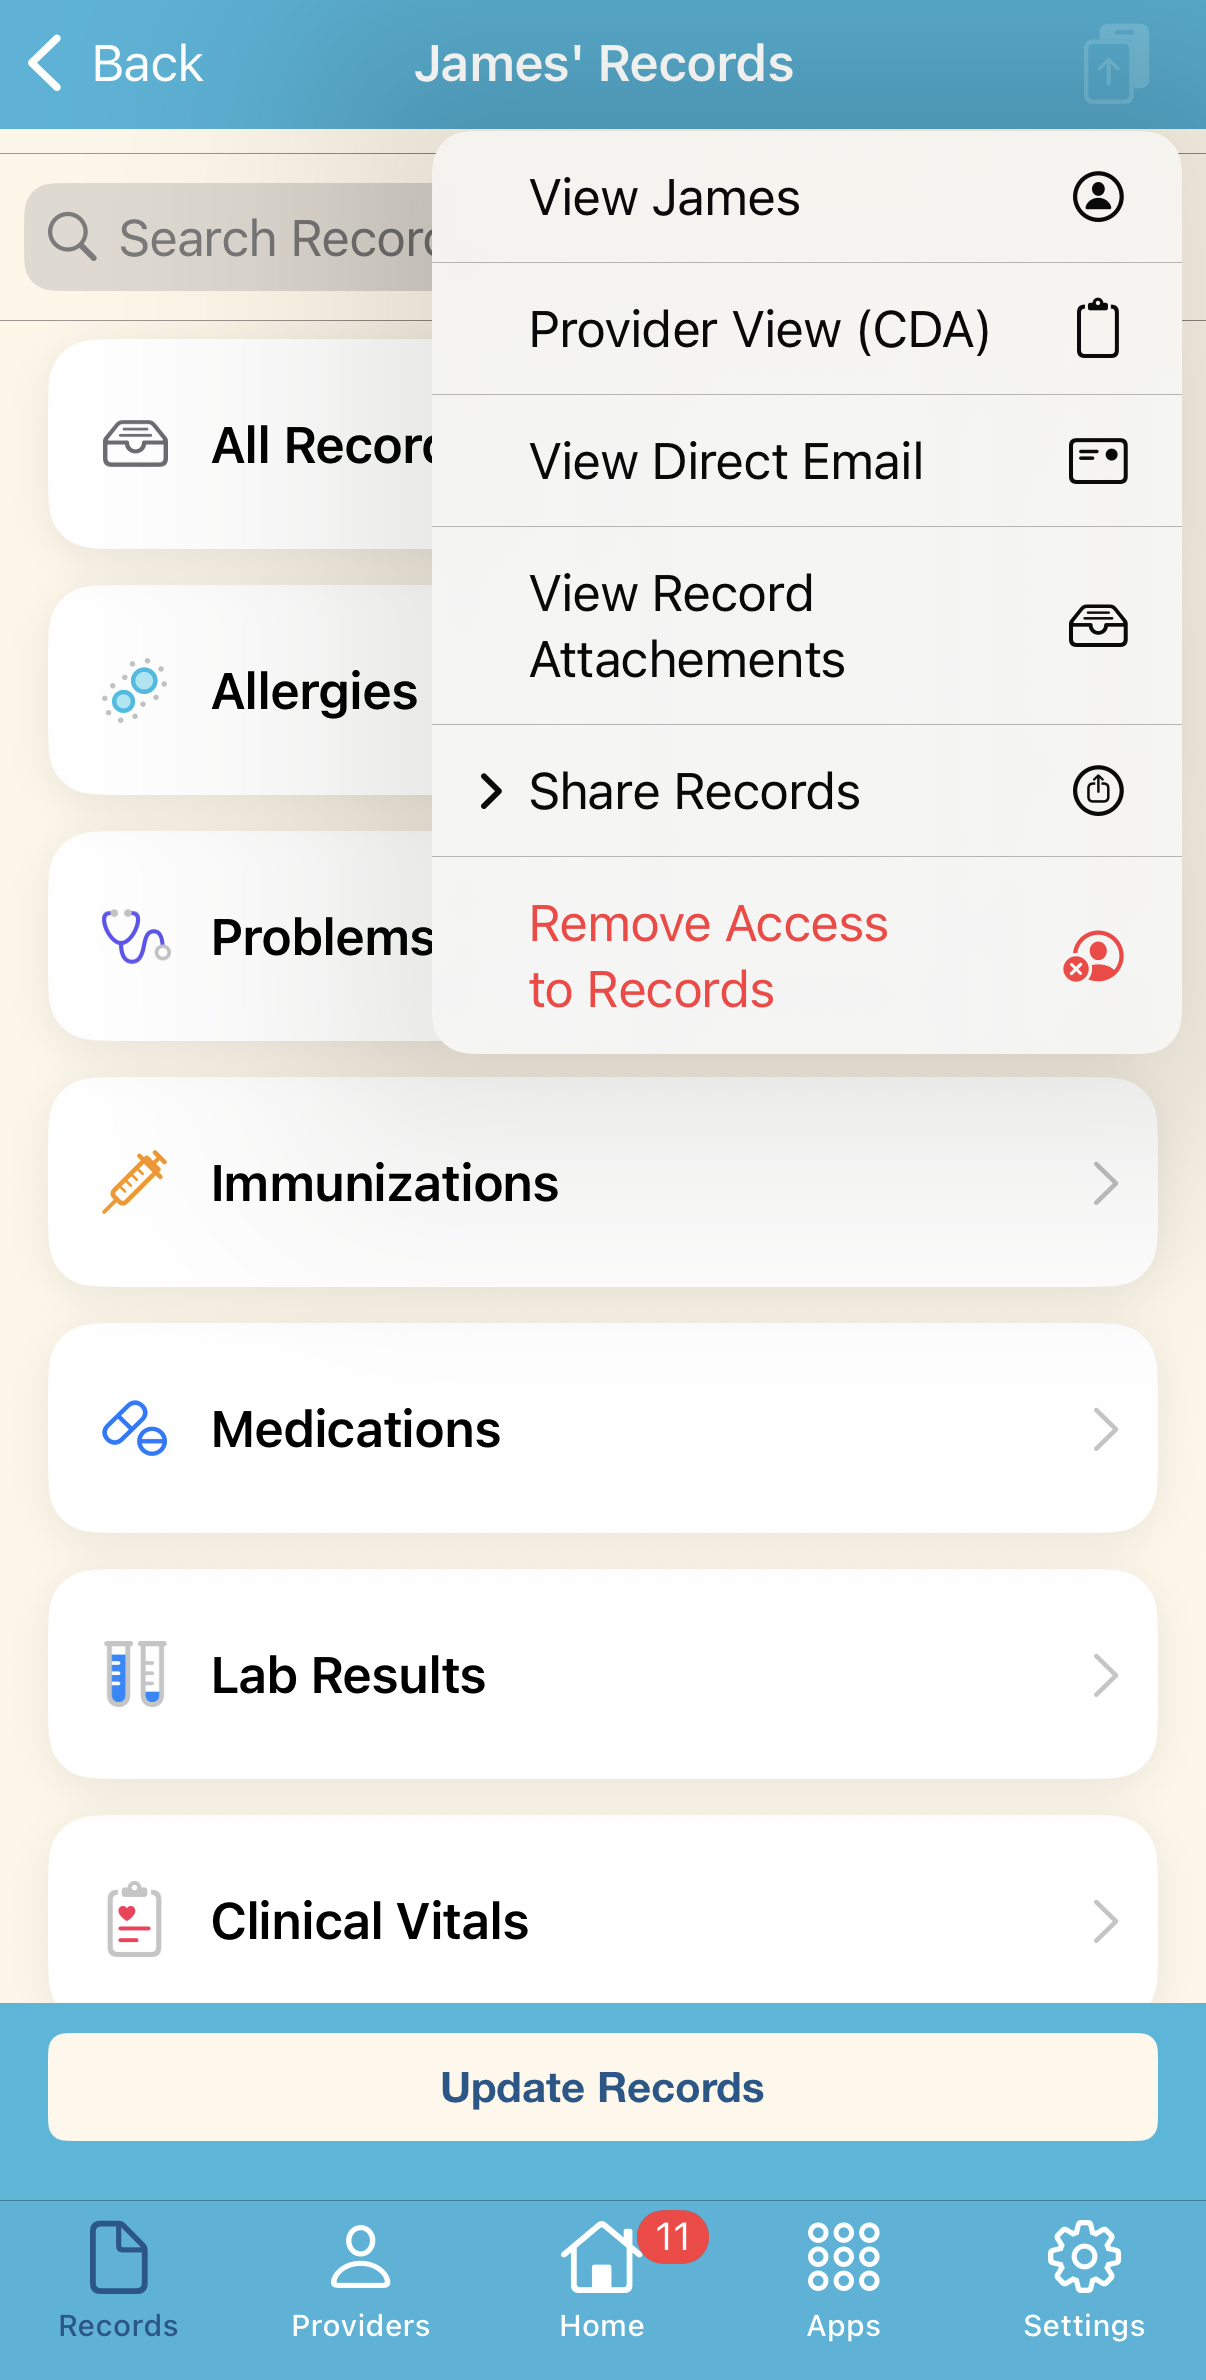
Alternatively, tap the icon on the top-right corner and select Share Records to share a CDA view of your records.
Run Into Something?
Our Support page has answers to common first-time questions from login codes to missing records. If you're still stuck, we're an email away.
Ready When You Are
Download Docsnap and take control of your family's healthcare. Your records, virtual care, and peace of mind, all in one place.